Loading the new software

Contents
After starting the installation program there will be a slight pause then you will see a welcome screen something like this:
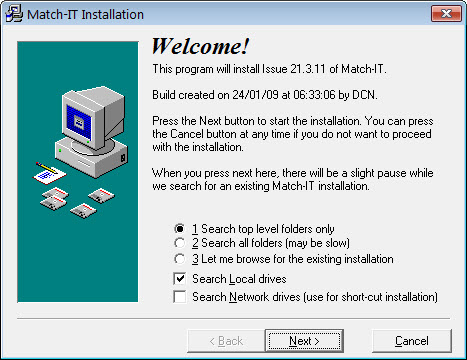
Press Next to proceed with the installation. The installation program will search your local disk for an existing installation. After it’s done the search you will see a screen something like this:
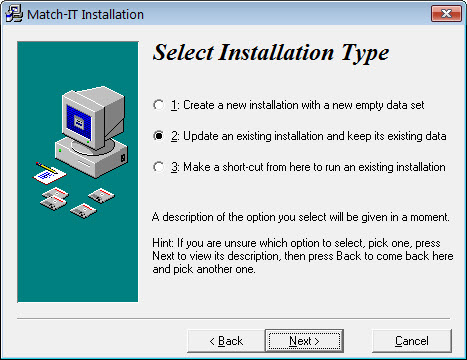
If your existing installation was found, option 2 to update an existing installation, will be selected. If your existing installation was not found, go no further. You must install the new version from a workstation that can see your existing system. The best place to do this from is your server. To do that, cancel this installation and start again on your server.
Make sure option 2 is select and press Next. If there is more than one installation available, you will get a warning similar to this:
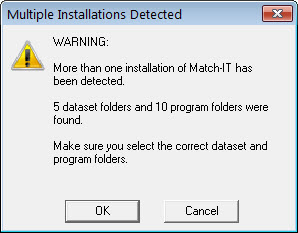
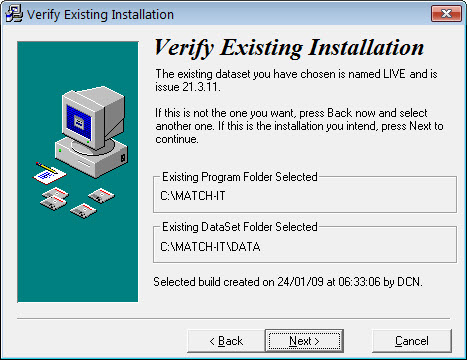
Make sure you select the installation you wish to upgrade in the next screen. Press OK if you get this warning. The next screen you will see will be something like this:
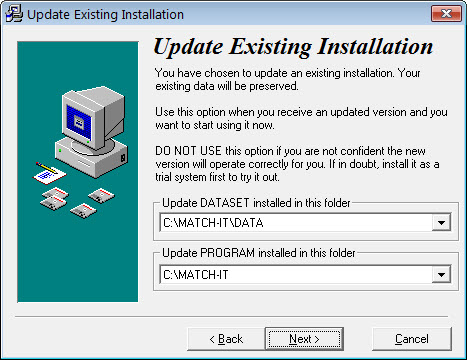
The DATASET folder shown should be the place where your Match-IT data is held. The PROGRAM folder is usually the parent of the data folder unless you have organised your folder structure in a non-standard way. In this case refer to your system administrator.
If you have more than one Match-IT installation on your system, the folder offered may not be the correct one. In this case, click on the drop-down list and select the correct installation. Make sure both the DATASET and PROGRAM folders are correct, then press Next. You will see a screen something like this:
Confirm the details shown are correct. If they are not, press Back to return to previous screens and change your selections. If they are correct, press Next. You will see a final confirmation screen like this:
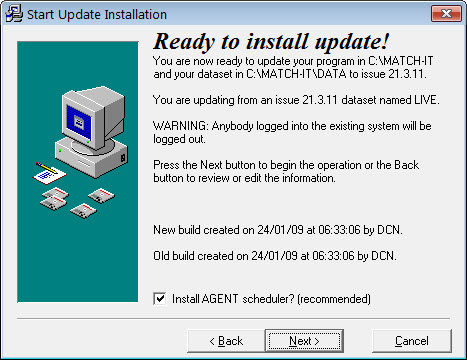
Make sure the details shown are correct, and then press Next.
The Install AGENT scheduler? option should only be checked if you are performing the upgrade from the same PC you are using to run the 'Agent', this is typically your server. In all other cases this option should be un-checked.
Next, you will see a final confirmation screen like this:
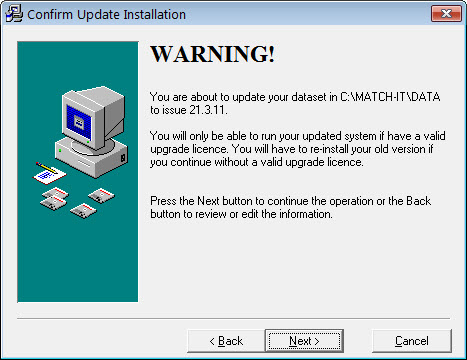
This is just warning you that you will not be able to run the new version of the software if you have not got a valid upgrade licence. This is your last chance to cancel without side-effects.
IMPORTANT: Although the new software will install without a valid licence, you will not be able to run it.
If you find you’ve done this, you must revert to your previous version by re-installing that from the CD.
When you are ready, press Next to begin the installation. Depending on the upgrade you may receive an announcment message, please read these. Here is an example:
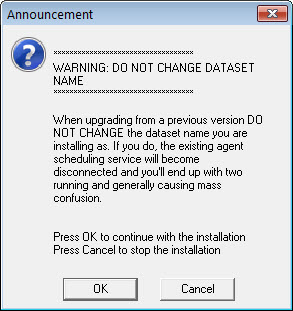
Press OK on any such message you receive. After a few moments you will receive another message like this:
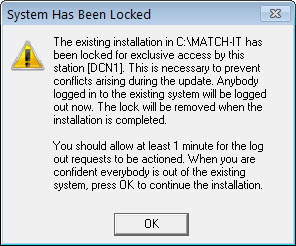
This is advising you that the system has been locked to prevent its use during the installation. If anybody is currently using the existing system, they will be logged out automatically within 1 minute. If you are not sure if anybody is using the existing version, just wait 1 minute then press OK to continue.
You will then be asked to confirm that nobody is using the existing system with a screen like this:
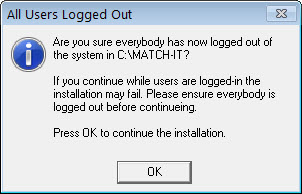
When you are sure nobody is logged-in to the existing system, press OK.
The new software will now be installed on your system. The process will take only a few minutes. When it has completed you will see a screen something like this:
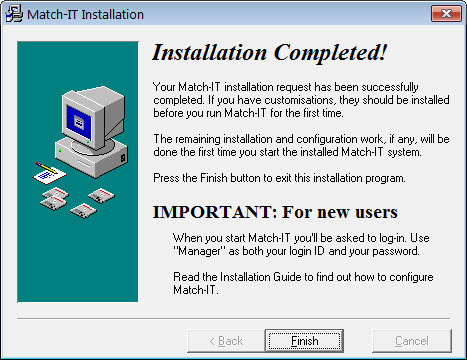
Press Finish to exit the installation program.