Initialising the new software

Contents
Initialisation of the new version is automatic the first time you run it. Start the upgraded system in the normal way to begin. It's best to do this from your server as the upgrade can be a very lengthy process.
You will see the usual splash panel appear. After a short pause, the system will begin to load. The first time it starts after an upgrade it will notice it’s a new version and will automatically initiate the upgrade process. This converts your data from the old version to the new. If this is the first time you have installed an update you may see this screen:
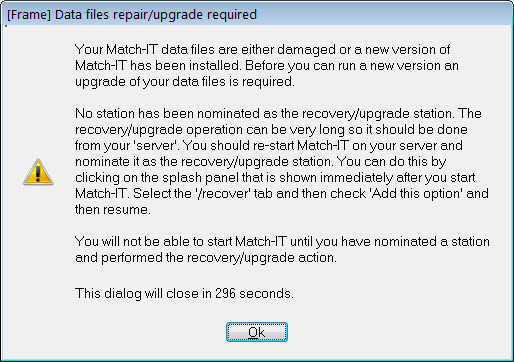
This is normal. It just means you haven’t nominated a station to perform the upgrade.
To nominate a station, press OK on the above message, this will stop the software. Start it again, and when you see the initial splash panel appear, click anywhere on it. This will bring up a screen like this:
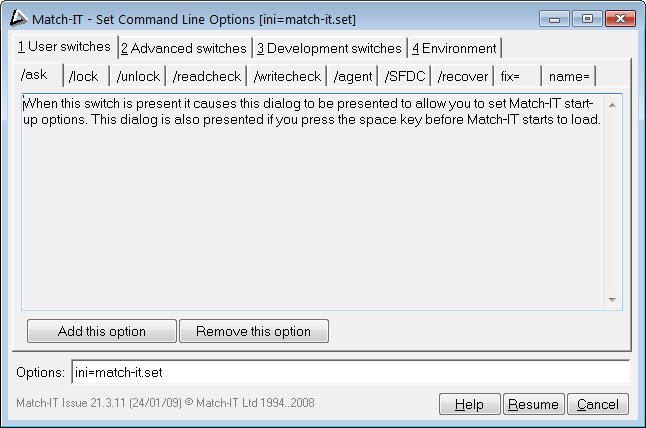
Select the /recover tab, the screen will change to:
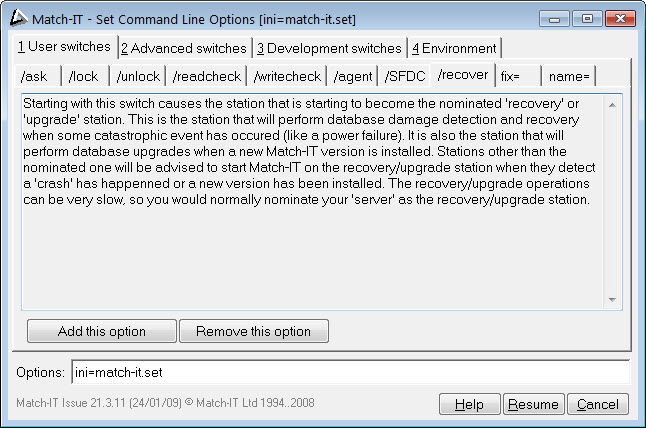
Then press the Add this option button, this will add the option to your options line, then press Resume to continue loading.
During the loading the system will detect all the data upgrading that is necessary and after a few moments you will see a screen similar to this:
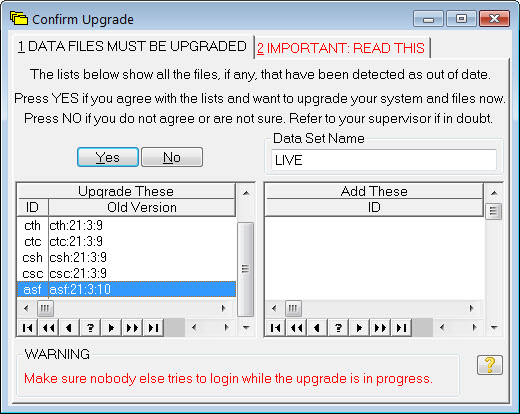
The list on the left will show all the existing databases that must be converted to the new version. It may be empty if the new version has not changed the format of any databases. The list on the right shows any new databases that are required for the new version. This is usually empty. Adding new databases is relatively rare.
If you see this screen, it means the new version has detected and understood the changes required correctly. If your old version is too old to be upgraded to the new version, you will see a different screen informing you of this. In this case, you must find an intermediate version of the software and upgrade to that first (these intermediate versions are referred to as ‘bridges’). Ask your Match-IT supplier for the appropriate ‘bridge’ version or check out http://download.make247.co.uk as many old versions are available to download from there.
IMPORTANT: Once your data has been upgraded it will not be possible to run your previous version. If you find the new version does not operate correctly for you, you will need to restore your data to the state before the upgrade and re-install your previous version of the software. For this reason it is STRONGLY recommended that you make a backup copy of your data folder before any upgrade.
When you are ready to proceed, press Yes.
You will be asked to confirm the action with a screen like this:
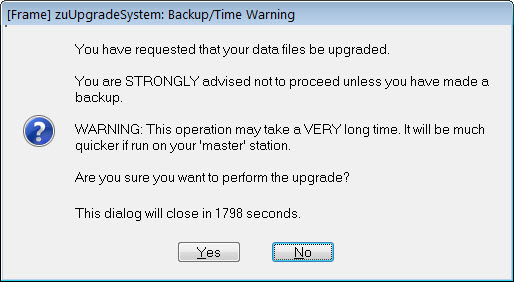
Press Yes to confirm the action.
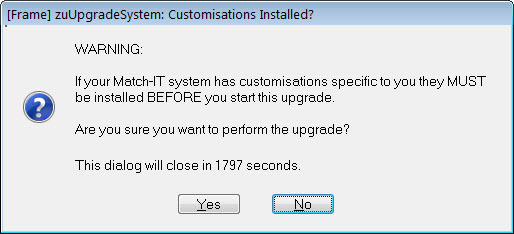
Next you will be asked to confirm that your customisations have been loaded. You can ignore this if you do not have any customisations. Press Yes to proceed. Next you will be invited to take a 'snapshot' of your data:

This is useful if you later discover the new version does not operate correctly for you. The snapshot will allow you to revert to your data as it was before the upgrade. The Snapshot Path offered will normally be your Match-IT backup folder. The procedure to recover data from this snapshot is described in Undoing an upgrade.
The final message you will see looks like this:
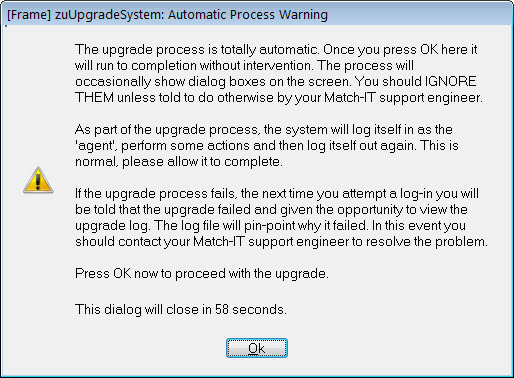
This is just informing you that the upgrade will proceed un-aided. Press OK and let it get on with it. Various messages may be shown as the upgrade proceeds. Just ignore them. Part of the process involves logging-in to perform some more actions and then logging out again.
If you leave it to it and come back later, it's normal to find it has shut-down. Start it again as normal. If the upgrade succeeded, you will be asked to log-in as normal. If it fails, instead you will see something like this:
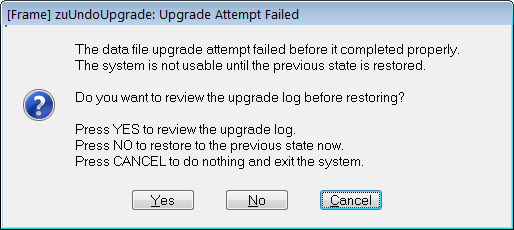
There are many reasons why the upgrade might fail. If it happens to you, contact your Match-IT support engineer for guidance. If you want to just back out of the upgrade and revert to your previous version, select No. Match-IT will then restore your data to its original state and start again. It will show the Confirm Upgrade dialog again. This time select No. It will shut-down. Find your previous version CD and re-install that.