How do I put header information into my paper?

Contents
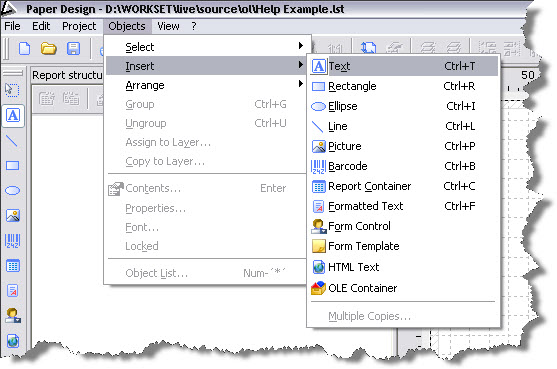
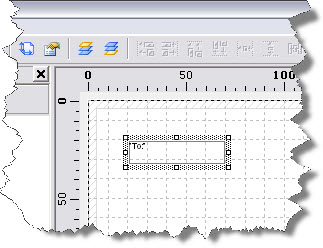
From the Objects menu, select Insert and then Text as shown below:
Using your mouse, define the position for the information by dragging the cursor from one corner of an imaginary ‘box’ to the diagonally opposite corner. Put the box somewhere near the top left-hand corner of the page, but don’t worry exactly where – it can be moved and re-sized later.
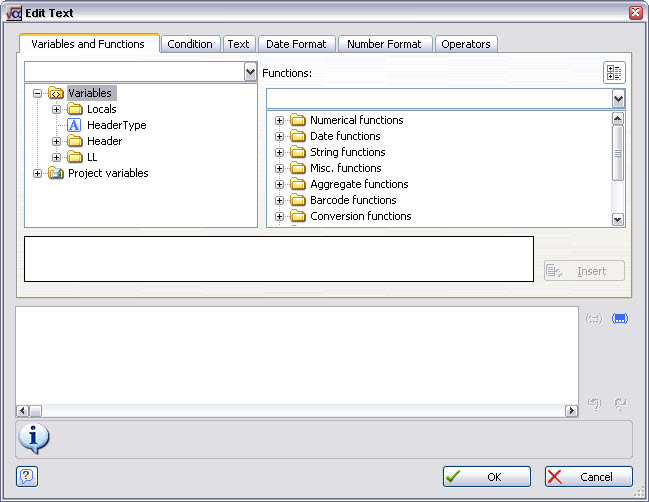
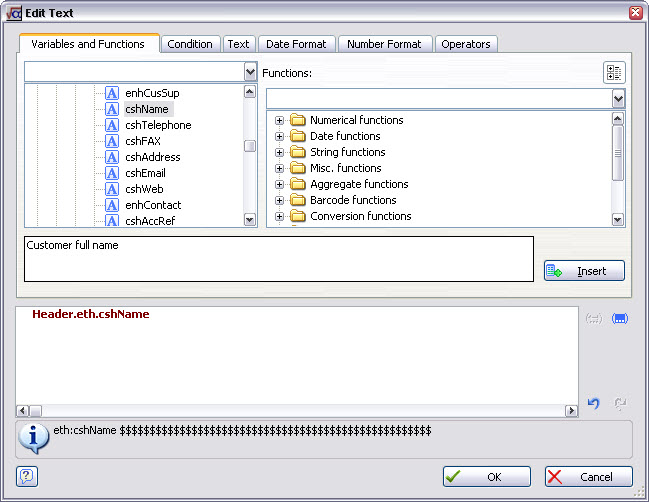
When you release the left mouse button, you will be prompted for the information to put in the box, like this:
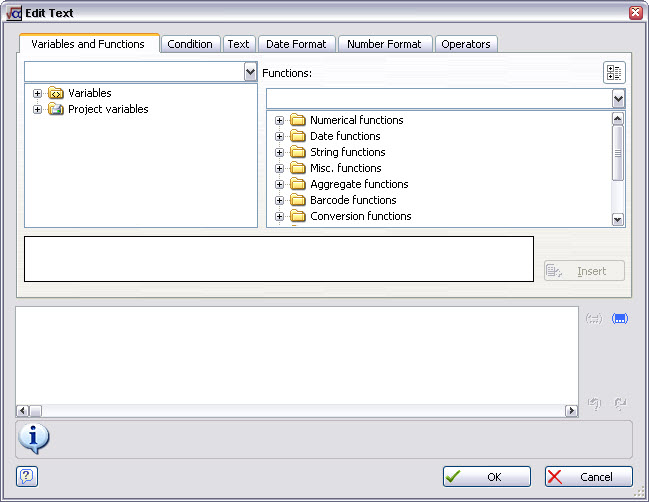
You will spend much of your working time in List & Label with this form, so it’s worth spending a few moments describing how it works.
The Variables and Functions tab is where you specify that you want to put variable information (taken from your Match-IT system) into your paper: a customer name, an order number, part numbers, for example. We will come back to this shortly.
The Text tab is where you specify that you want to put fixed text into your paper. In this context, text is words (or numbers) that will never vary when you print your document. Most of this fixed text is likely to be short prefixes to your variable information: “To:”, “For the attention of:”, “Signed:_______________”, etc.
The other tabs contain List & Label’s more advanced features. Don’t worry about these for now – we will come back to some of them later.
For the moment, let’s just put some fixed text on to our quote paper. Select the Text tab, and type the word To: into the box at the top as shown in the below.
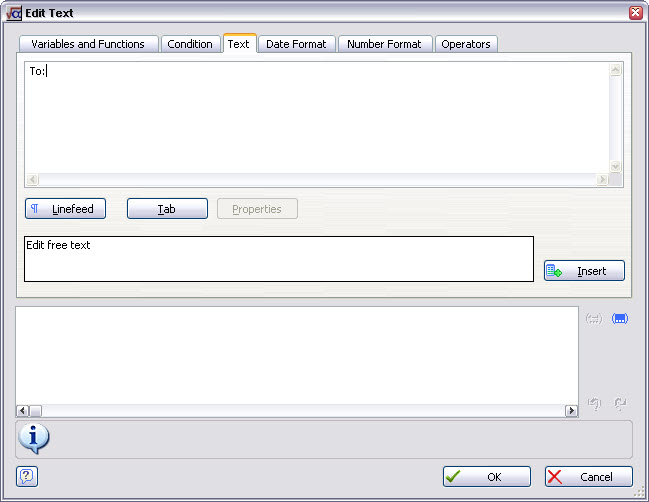
Now press the Insert button. You will notice that the text you typed has moved into the box at the bottom of the form, as it is shown below in blue, and that List & Label has added quotation marks around it. The quotation marks will not appear on your printed documents – they and the blue colour are merely List & Label’s way of distinguishing fixed text from other types of information in your paper.

Press the OK button. This will take you back to the paragraph properties dialog that List & Label opened for you when you released the mouse button while dragging earlier, as shown below:
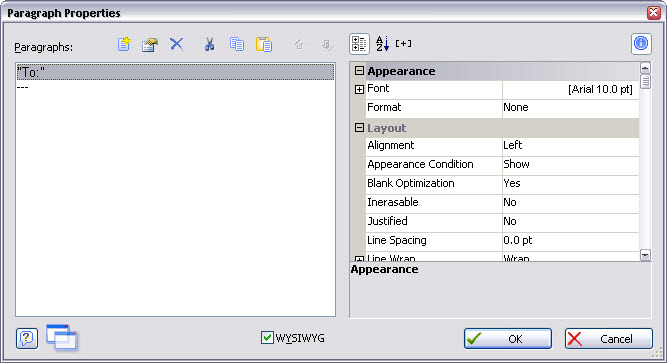
From here, you can change its font, colour, size and other attributes using the controls provided.
Increase the text size to 11 pt, by clicking in right-hand pane of the Font property (where it says [Arial 10.0 pt] in the example above) and then clicking on the ![]() icon. This will open the usual Windows™ font selection dialog, as shown below.
icon. This will open the usual Windows™ font selection dialog, as shown below.
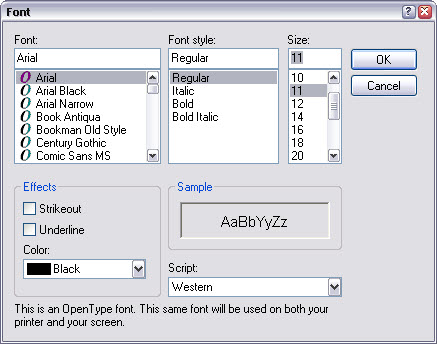
Select 11 pt and press the OK button twice to close the forma. Your text should now be visible in the design workspace, like this:
From the Objects menu, select Insert and then Text as before. Using your mouse, define the position for another box to the right of the existing one. The Edit Text dialog will open as before. This time, we'll enter some variable information rather than some fixed text.
The variables are gathered into groups, which are accessed, via a tree structure that you will recognise from Match-IT (and other applications e.g. Windows™ Explorer). Press the + symbol to the left of the word Variables to open up the tree, as shown below:
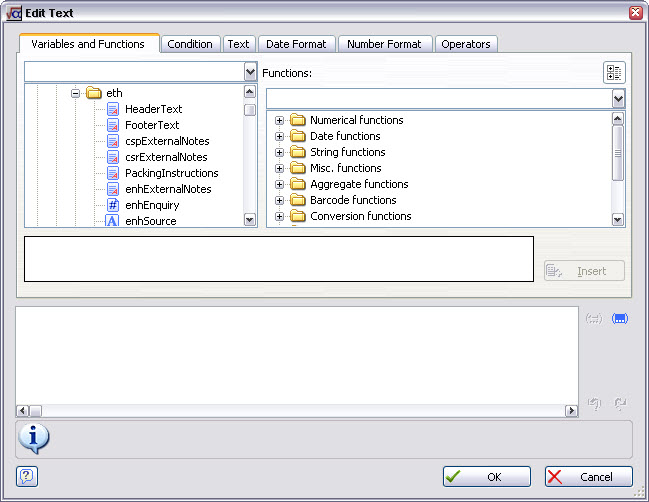
Most of the information we require for the header part of our paper is contained in the Header group, so press the + symbol to the left of the word Header to display a list of Match-IT files available for use in the quote header. The only one showing is eth (which is Match-IT’s quote header file). Press the + symbol to the left of the word eth to reveal the list of variables, as shown below:
The symbol to the left of each variable name represents the type of information that the variable comprises, as shown below:
|
Formatted text - RTF |
|
Plain text |
|
Logical (i.e. only has yes/true or no/false values) |
|
Number |
If you are familiar with spreadsheet or database programs, you might expect date information to be a fourth type. However, Match-IT dates are all passed to List & Label as text; this means that you cannot use List & Label’s date formatting functions to format dates passed from Match-IT. (However, you can use List & Label functions to take text apart and put it back together again in a different order – see Use of advanced features.)
The first three letters of each variable name is Match-IT’s internal code for the data file holding the information. The remainder is Match-IT’s internal name for the variable itself. You will be able to recognise many of these names: for example, enhEnquiry (which we can see is a number) is the unique number Match-IT assigns automatically to each of your enquiries; enhSource (which we see is text) is the enquiry source which appears on the Addr/Notes tab of Match-IT’s enquiry form. You will also notice that when a variable is highlighted, a brief description is shown in the area below the variable list. If there are any names that you are unable to recognise, a more detailed list is provided in the reference section of the on-line help.
Scroll down the list of variables until you find cshName which is the customer’s full name. Click on cshName and press the Insert button. As with the fixed text we entered before, you will see that it has been placed in the box at the bottom of the form. The brown colour indicates that List & Label recognises it as a variable.
Press OK, increase the text size to 11 pt in the Text Properties form, and press the OK button again to close the form. Your design workspace should now look something like:
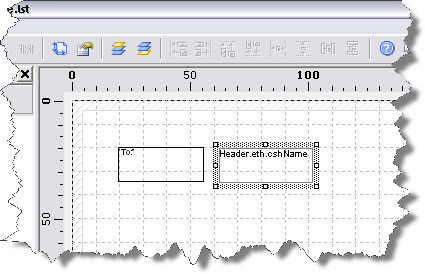
After all this work, you now have a paper that will print To: Joe Bloggs Limited if you were to produce a quote to a customer of that name.
You might find that Joe Bloggs Limited doesn’t fit in the space you have allowed for it (as defined by the rectangle shown above); this would cause it to truncate (i.e. it might print as To: Joe Bloggs Limi). To prevent this, enlarge the box by clicking the re-sizing handle on the right-hand side of the rectangle, and dragging to the right.
You are also likely to find it difficult to exactly line up the To: with the customer name; List & Label can help you with this. From the Project menu, select Options… to display this form:
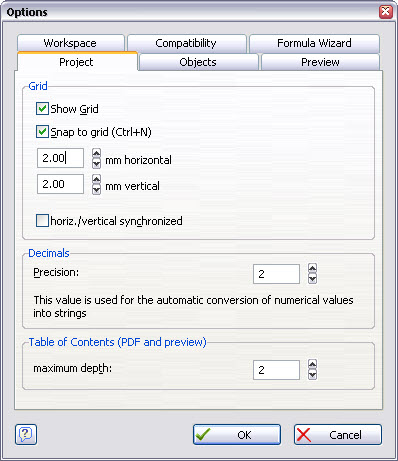
Click the Snap to Grid check box to enter a tick, make the grid a suitable size as shown above, and press OK. You will now find that when you re-size any item in your paper it jumps to the nearest grid position; this will help you line up the various elements of your paper.
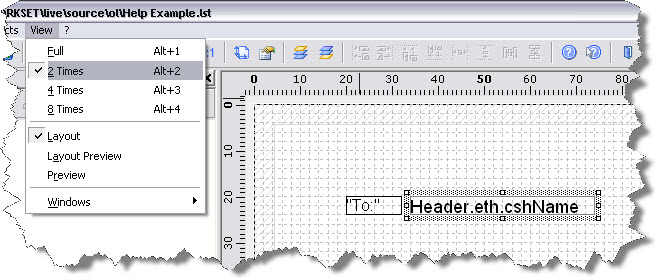
If the elements on your paper look rather small, you can view them at a larger scale by pressing the View menu, and selecting 2 Times, 4 Times or 8 Times magnification. Note that this does not change the paper itself – you are merely looking at it though a magnifying glass. This is similar to the Zoom facility in many word processors.
Creating the rest of the header section of our quote paper is just a matter of continuing to add fixed text and variables in this way.
In the illustration below, the customer’s address has been added below the name. Because addresses contain several lines of text, the rectangle defining its position has been made deep enough to show all these lines. If you find that some of your customer address lines are not appearing in your printed documents, you can increase the space allocated by dragging the resizing handles as described above.
Match-IT allows a separate delivery name and address to be specified for the goods being quoted for, and these have also been added as shown:
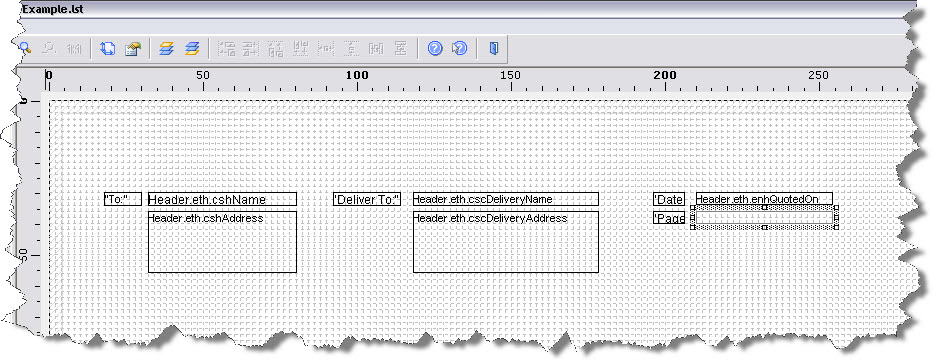
In this example, we have come to the point where we want to print a page number in case the quotations run to more than one page. Page numbers on the printed document are not governed by Match-IT – there is no variable for this. Instead, List & Label can itself generate page numbers, and you can place them in your paper by means of a function.
Proceed as if you were going to place a variable in your paper, but when you get to the Edit Text screen, press the + sign to the left of the Project and Print dependent functions on the right hand side in the box labelled Functions:. Click on the function called Page$() as shown in the illustration below. List & Label indicates to you the purpose of the function that you have selected in the box below the function list.
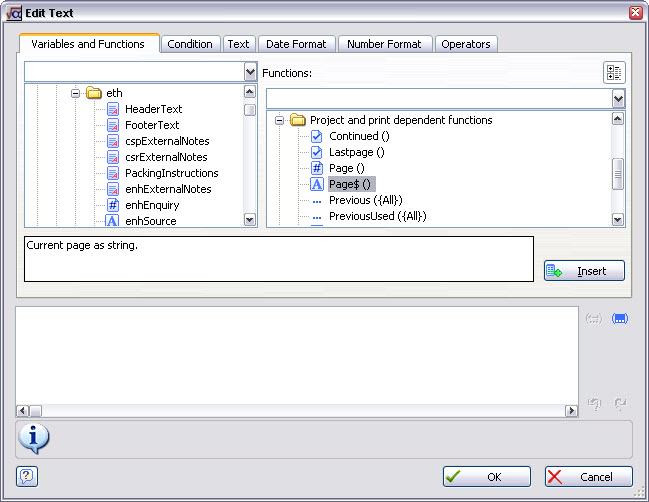
Press Insert, then OK and OK again to return to the design workspace; the page number will now be printed on your quotations. In a similar way, you might like to use the TotalPages$() function to print the total pages of the document along with the current page (e.g. "Page 1 of 2").