Conditional printing

Contents
Up until now, this user tutorial has guided you through the basic processes that most of your business papers will require. However, List & Label also has a number of capabilities that enable you to incorporate more complex requirements into your papers.
Most useful of these advanced features is the conditional expression. In the context of your business documents, this is saying: “if a field (piece of information) is equal to something, then print one thing; otherwise print something else”. For example, in the quotation paper we have created throughout this tutorial, we could change the delivery address in the header section such that if no separate delivery address were specified for an enquiry, the quotation document would say “As Quote Address” instead of being left blank.
To do this, double click on the delivery address area in the paper, and then double-click again on the Header.eth.cscDeliveryAddress of the Paragraph Properties form. Click on the tab labelled Condition to reveal the form shown below:
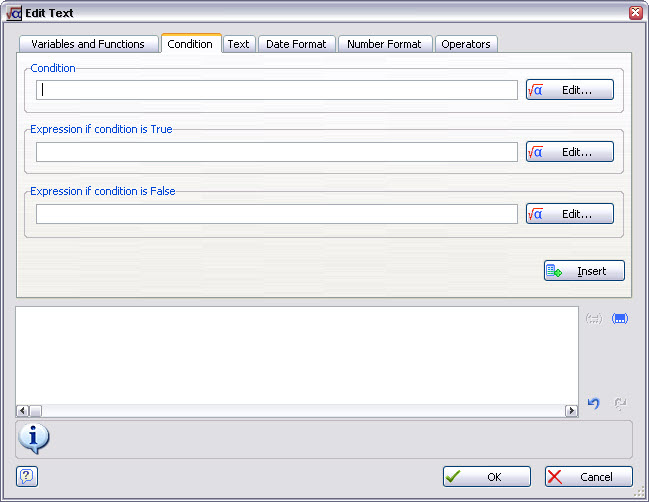
List & Label helps you build up conditional expressions so that you don’t have to worry too much about the syntax. First of all, delete the Header.eth.cscDeliveryAddress from the bottom box so that we can start again.
The condition we need to test for is whether the delivery address is blank. Press the Edit… button beside the Condition box to open another almost identical form. Select the delivery address from the list of variables in the usual way, and press Insert. Then add an equal sign, which you can either type in directly to the bottom box, or select from the Operators tab, select = and press Insert. To enter a ‘blank’, go to the Text tab and just press Insert, or type in two double quotation marks yourself. Your form should appear as shown below:
Press OK to return to the condition form which will be as shown below:
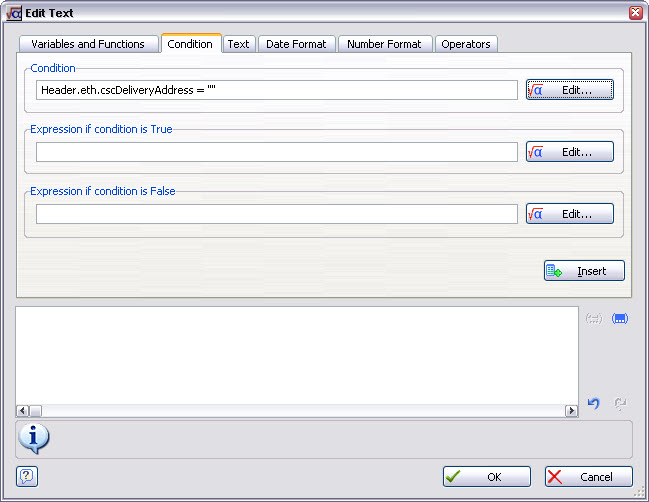
The first part of our conditional expression is now in place.
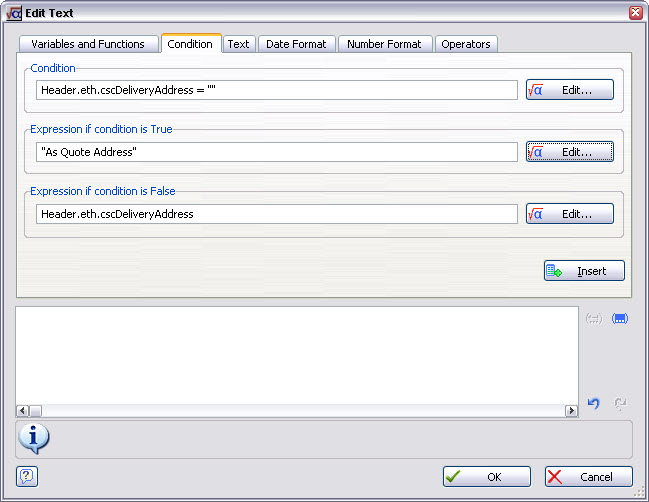
The second stage is to specify what we want to print if the condition is true – that is, if there is no delivery address. Press the Edit… button beside the Expression if condition is TRUE box, select the Text tab and type As Quote Address, then press Insert and OK to return to the condition form. This completes the second part of the conditional expression.
You can probably guess what you need to do now: press the Edit… button beside the Expression if condition is FALSE box, select the Variables and Functions tab and select the delivery address from the list of variables in the usual way. Then press Insert and OK to return to the condition form. This completes the third and final part of the conditional expression, and the condition form will be as shown below:
If you now press the Insert button, List & Label will build the conditional expression automatically from the three elements you have provided, as shown below:
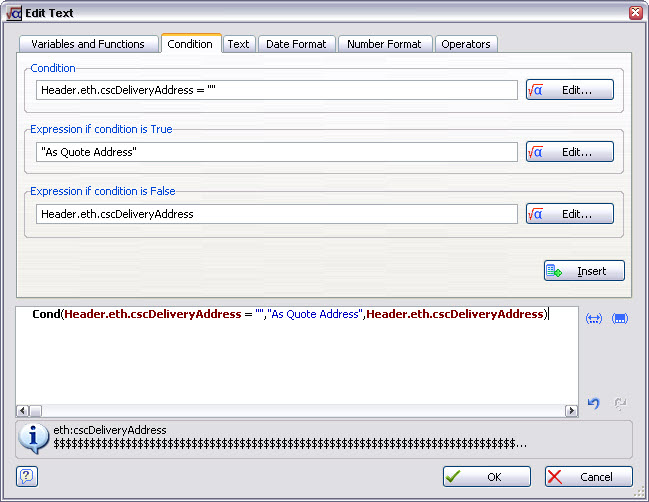
The structure of the expression is similar to that found in spreadsheet packages you may have used. Press OK twice to return to the design workspace.
There are numerous uses for conditional expressions. For example, documents usually look better if the printing of fixed text is suppressed when the variable information associated with it is blank. Hence your paper may contain Drawing No: as fixed text, followed by a variable drawing number taken from Match-IT; if this number is ever missing, your document will still say Drawing No:, but have nothing after it. You can prevent this by using a conditional expression.
Another form of condition available to you is appearance conditions. These allow an entire row of data from the details section of a paper to be suppressed if a condition is false. This can be useful in situations where you want to vary the column structure of the details section in a paper according to a specified condition. For example, if you cancel a line of a purchase order to a supplier, you will need to send your supplier written advice of this. In this situation, you might want to replace several columns in your purchase order paper (e.g. quantity, price, delivery date) with a single column saying ORDER LINE CANCELLED. Two data lines are therefore required in your table: one which specifies what to print if the order line is not cancelled (the usual condition), and a second to specify what to print if it is. This can be achieved with appearance conditions.
To do this, select the data line in your table that you want to control in this way, select the Appearance Condition property, drop down options and select Formula..., as shown below:
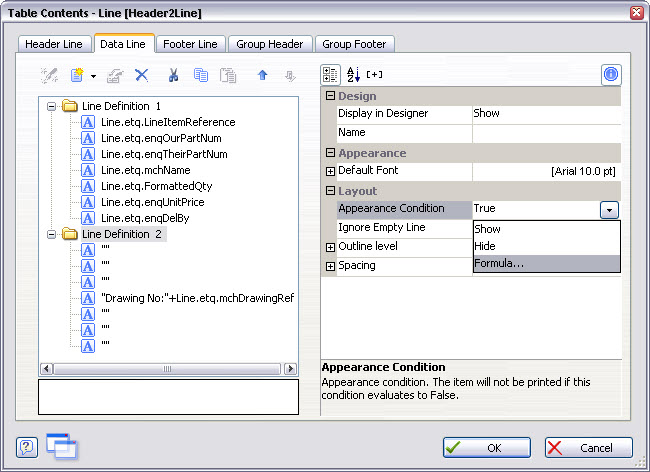
You can build any legitimate expression in the usual way, using combinations of variables, text, functions, etc. The illustration below is an appearance condition created for the second data line in the example used in this tutorial (which adds the drawing number into the Description column of our paper).
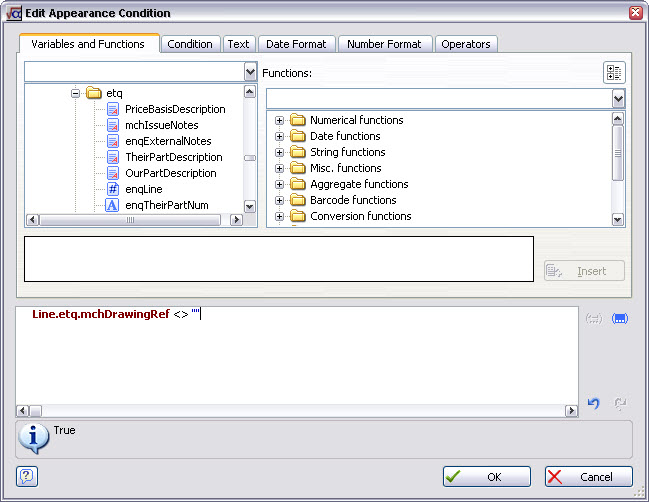
The appearance condition is saying: “only print this second line of data if a drawing number is present for the part being quoted”. (Note: ‘not equal to blank’ is the same as saying ‘is present’.)
There are many other facilities available in List & Label. Far too many to mention here. Explore the List & Label help file and experiment. With a bit of imagination you can do amazing things.