Building user specific menus
To create a user specific sub-menu proceed as follows:
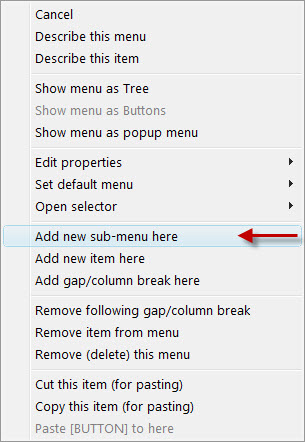
1.Right-click on an existing ribbon-menu that you want to act as the ‘root’ of your new sub-menus.

2.Select the Add new sub-menu here option. This will create a new sub menu on your desktop like this:

3.Now right-click on the new sub-menu and select the Edit properties then the Edit menu properties item.

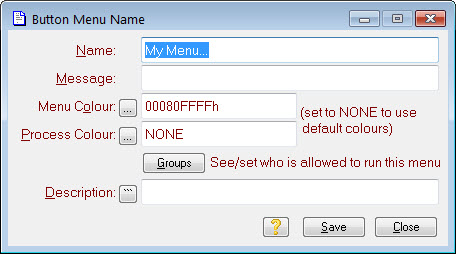
This will open a form to allow you to change the name of the new menu.

4.Type a suitable name for the menu in the Name field, e.g. John’s Menu and press Save and Close. The menu name on the desktop will change.
5.Right-click again on your new sub-menu and select the Open Selector and Open process selector items.

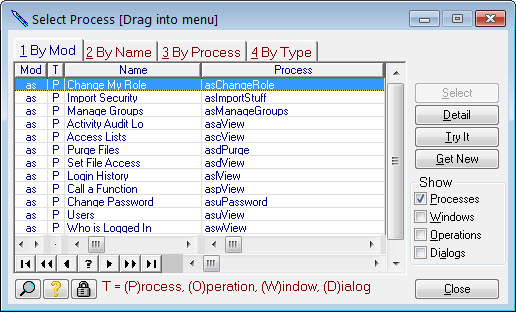
This will open the list of all functions that can be placed onto menus.

These can be dragged onto your menu to create buttons. If you want to know what one of these functions does, just press the Try It button. Return to the select process list when you’re done trying it.
6.Find a function you want on your menu, by locating as described in Locating by selecting, drag it onto your new menu and drop it where you want the button. The first button you place on a new menu will replace the initial Close Menu button. It will also make the new sub-menu appear on your original 'root' menu as a My Menu... button (empty menus do not show, which is why it did not appear until you added a button to it).Your new sub-menu will now look similar to the one on the right here.

Repeat the drag-&-drop process to add other buttons you want. This has built the menu. The next step is to assign it as the default for a specific user.
7.Right-click on your new menu again and this time select the Set default menu and Set as user default menu items.

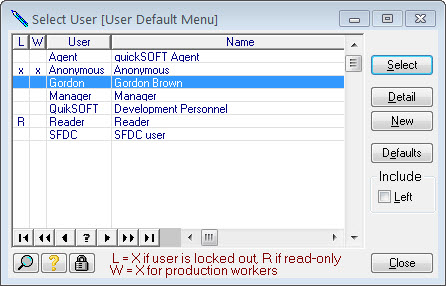
This will open the user selector.

8.Find the user whose menu you have just created and press the Select button.
The new menu is now the default for that user and will be shown to them the next time they log-in.
