Add your initial users

Contents
You should allocate a user account and user ID to each user you intend to allow access to your system. The Manager account you’ve used so far should be reserved for the system administrator. Many operations done in the system are tagged with the user ID that did it, so it’s useful to allocate a different ID to each user and instil a discipline of only logging-in using the correct user ID. Also, you can control what each user is allowed to do within the system by only allocating them the minimum privileges necessary to do their job.
Note: You can have as many user accounts as you like. Your Match-IT licence just limits how many of these users can be logged into the system at once.
There follows a menu-independent method of accessing the appropriate part of the system to add a new user:
Select Processes from the menu line just below the desktop title and then the Go Anywhere item. A panel like the one below will appear:
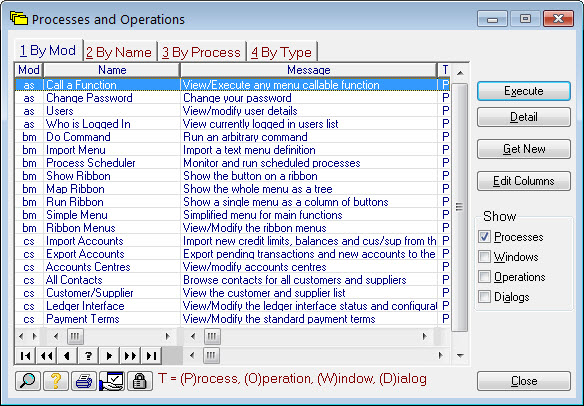
This is a tabular list of every function in the system. It’s a useful way to get around when you know what you want, but are not familiar with the menu system in use. Select the line that contains Users in the name column and press the Execute button. A panel like the one below will appear:
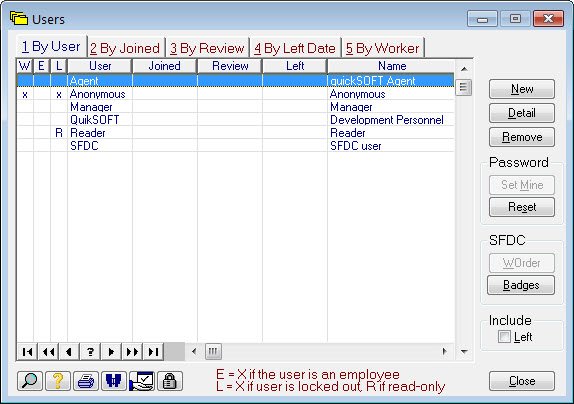
This is a list of all the user accounts. Notice the Manager account that you’ve been using so far. To add a new user, press the New button. A form will appear like the one below:
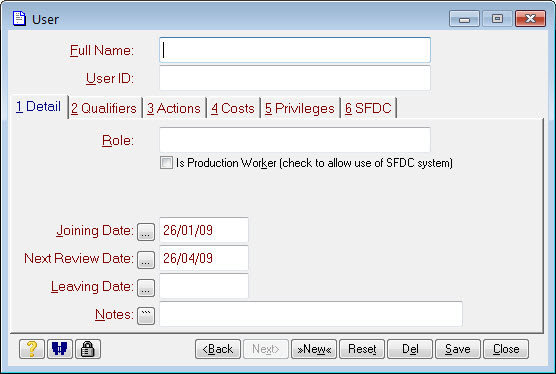
Fill in at least the Full Name and User ID fields, other fields are optional. The User ID must be entered during log-in to gain access to the system. The first time a new user logs in; their password will be the same as their user ID.
You must assign privileges to the user to allow them to do things that are appropriate to their role. Do this by pressing the Groups button in the Privileges tab (#5). A set of options will be shown as below:
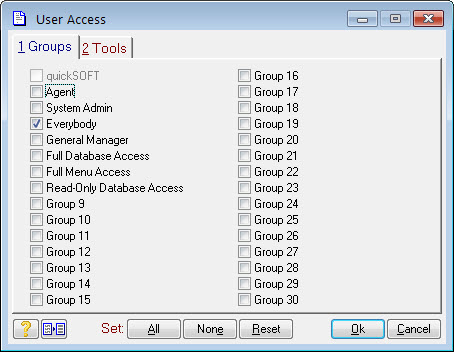
The security system is based around the notion of user groups. The panel of options shows the names of all the groups (your system may have different names to the ones shown). Each one ticked allows the associated user access to the functions implied by the name. The Everybody group should always be ticked, this provides the minimum privileges necessary to allow them to log-in. The privileges associated with each group can be changed; the Welcome wizard you ran earlier defined their initial settings. The topic is discussed in more detail in the Setting up your security scheme section. Tick whichever options you think apply and press Ok. You can change them later if you find the user hasn’t got the privileges they need.
Press Save on the user form. The new user account is now set-up and ready for use. Repeat the process as necessary to define all the accounts you need.