Printing Multiple Tables

Contents
The example we have used so far only had a single table in the paper. This is all that is available for a quotation. However, some documents in Match-IT can have more than one table, for example a dispatch note has two (the dispatch items and the stock batches that make up those items) and a works order can have up to eighteen!
When more than one table is available, when you create the first one you will be asked to select the data table. A form similar to the one below will be shown as you release the mouse after having drawn the area for the table:
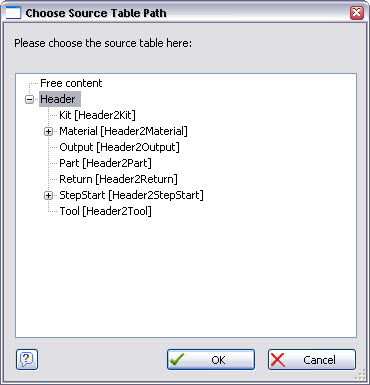
This will show all the available data tables. Select the one you want, another form will then be shown like the one below:
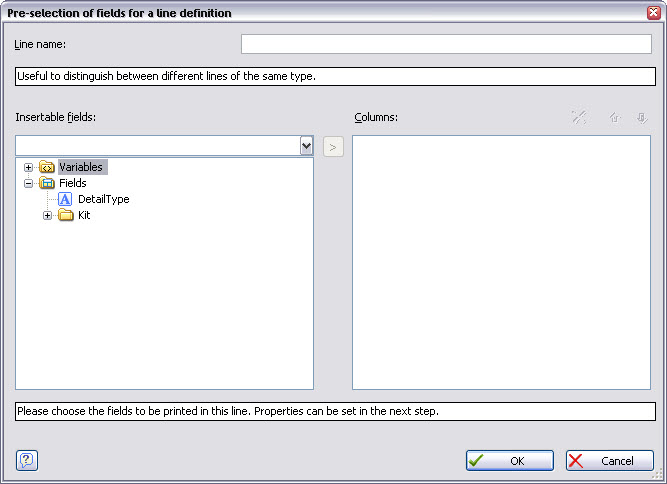
This allows you to quickly select the fields you want by dragging them from the left pane to right pane. Only fields that are valid in the context will be shown. After dragging, press OK and the table contents definition form you’ve already seen above will be shown:

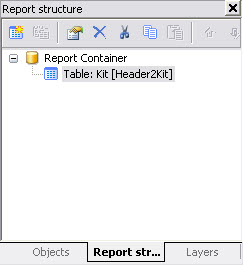
This can be edited in the same way as you’ve already seen. When you’ve done that and pressed OK to get back to the design workspace, you’ll see a pane called the Report Structure (if this is not visible, press View | Windows | Report Structure in the menu). Initially it will show just a single table, like this:
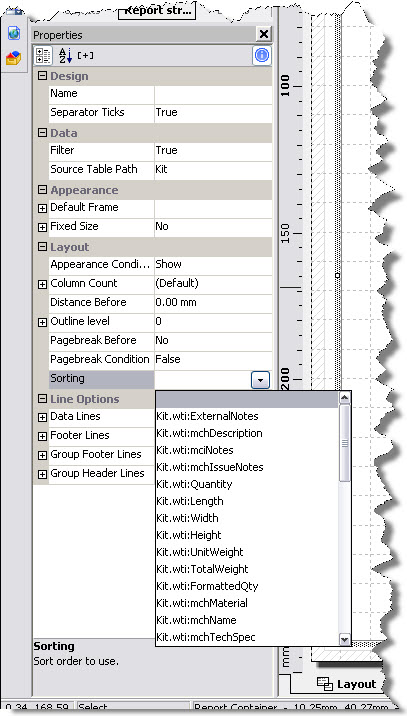
You can now add more tables by using the tools available from this pane. Each table will occupy the same area on your paper, but the information content will be different. The tables will be printed in the order you see them here. You can also specify the order the records are printed within each table. To do this, press the drop-down on the Sorting property in the properties window, as shown below:
For a complete example, open the UserJobCard paper in Match-IT and explore how it is setup. The table structure for that is shown below:
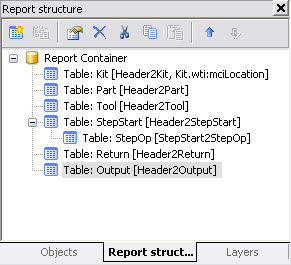
In this example, the kit section is printed, then the parts list, then the tools list, then the steps, then the kit returns, then the outputs. Within each step, the operations (resources) are printed.
Each table can be printed more than once if you want, for example you could print the kit list twice, once in location order and then again in batch number order. To do this, just add it to the structure again.