Part Types
There are several part types.
First Alternative
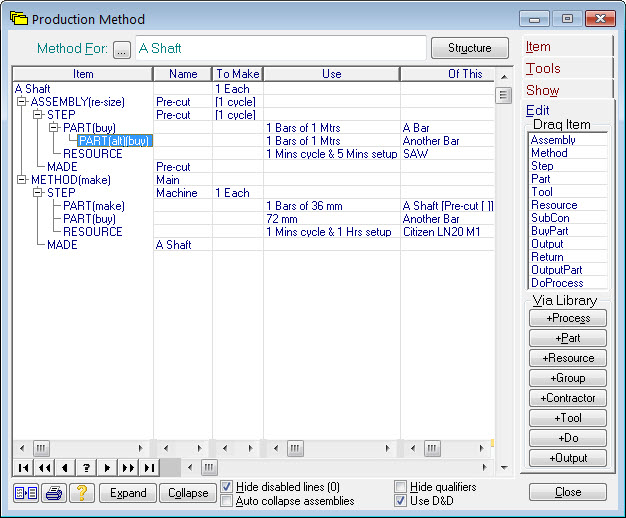
This marks the beginning of a PART specification and also defines the first alternative (choice) for the material. Choices for the part are identified by indentation; multiple parts are identified by being on the same level, like this:

Here the re-size assembly can use A Bar OR Another Bar and the main method needs A Shaft [Pre-cut [ ]] AND Another Part.
Next Alternative
This marks another choice for a PART (see above). There can be any number of alternatives.
Reference Only
This is just a place marker for documentation purposes. It’ll appear in the works order, but no stock will be allocated for it.
Use same parts as another step
This is useful if you have a step with a large number of parts and the same parts are required for more than one step. In this situation, just refer this PART to the STEP and the same parts as that step will be used here. For example, if you make a left-handed widget and a right-handed widget and they are identical from their component parts point of view. This means you only have one parts list to maintain when things change. Other parts can be included as well, so you could use this facility to specify a common ‘kit’ then specialise it as necessary.
Use the outputs of another step
This is useful in conjunction with dis-assembly methods. Say you buy something, then take it apart and re-build it into something else. Just specify all the parts extracted in the dis-assembly method, then refer to that step with one of these part types. The benefit is that, again, you only have a single parts list to maintain.
