Issue kit

Contents
Selecting the issue kit option will move the controller on to a page that looks similar to this:
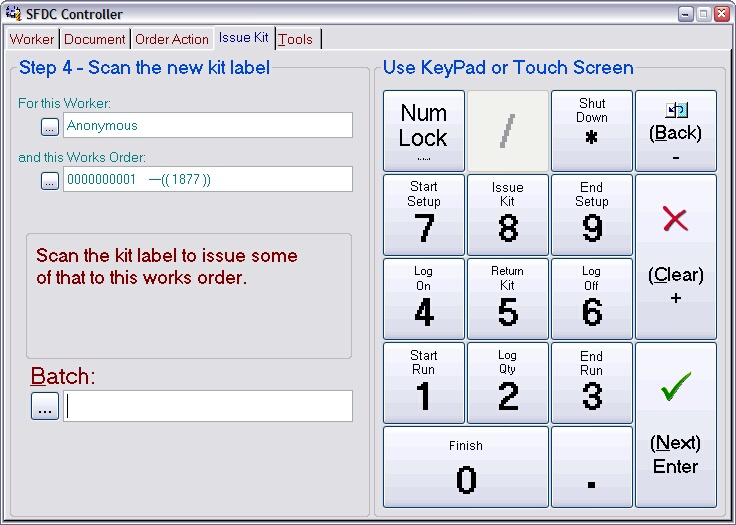
Note: You only need to issue kit that is in some sense ‘extra’ to what you would normally use. The kit defined in the method for the product is automatically issued when the works order is approved (unless you approved it as a ‘back-flush’ order).
To issue kit to a works order, scan the code on the label that is attached to the kit batch. The label can be a goods-in label or an inspection label or a batch label. What happens next depends on whether the batch you scanned is ‘ambiguous’ or not. An ambiguous batch is one where there is more than one batch record with the same batch number and you have not distinguished them by giving them a unique instance name. Returning off-cuts typically creates ambiguous batches.
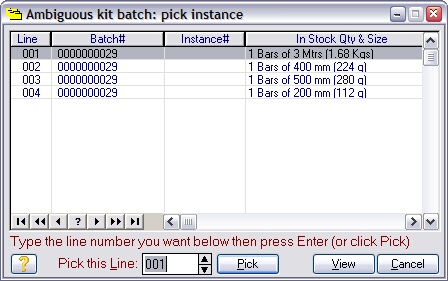
When an ambiguous batch is scanned a dialog will open showing you all the batches with the same number. Use this to pick the specific batch you want. You do this by typing the line number in the list you want then pressing Enter.
The dialog that opens to allow you to pick an instance will look similar to this: |
|
Once you’ve scanned (and picked) a batch, the controller will move on to the next page, which will look similar to this:
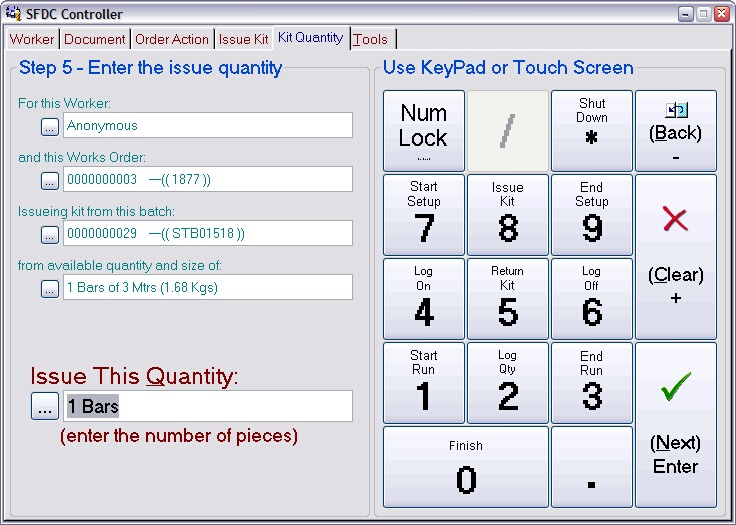
Enter the quantity of the batch you want to issue and press Next.
Note: Only whole items can be issued like this. If you only want part of a piece, then issue the whole piece, cut off what you want and return the excess (using the return kit facility described later).
The final page asks for a confirmation, it looks like this:
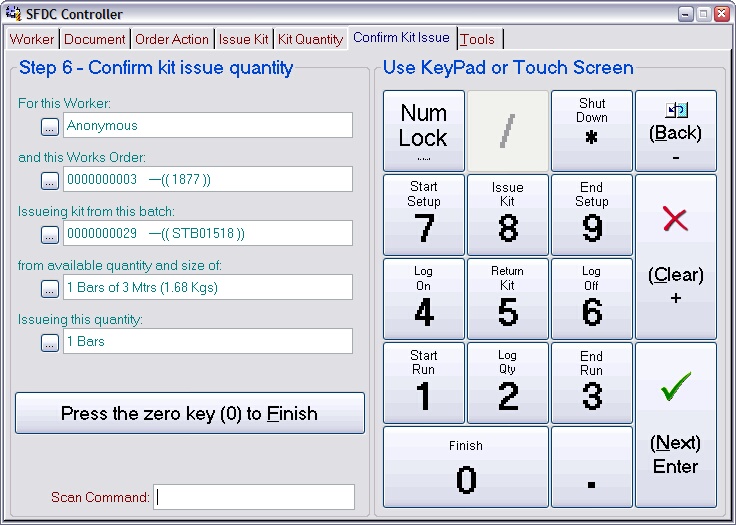
Press the 0 key to confirm the issue. The controller will return to the front page ready for the next worker ID scan. Press the Back key to return to previous pages to review or edit them.
Once you confirm the action, the associated material is moved out of stock and into WIP. It’ll also appear in the kit list for the works order.