How do I start the paper designer?

Contents
This topic will explain how to use List & label by taking you step by step through the processes involved in creating a simple example paper. It can be read alone, but is best used as a guide to actually performing the example in the system itself.
The procedure we will perform here is to create a quotation paper to send to a customer in response to an enquiry. Most of the same steps are involved in creating any other type of paper, although differences will be pointed out as we go along.
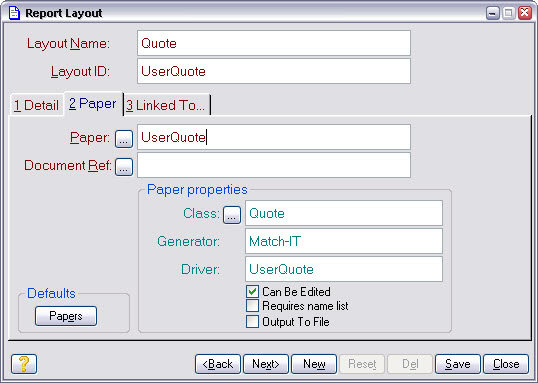
From the standard menu press Favourites|Functions|Setup|Setup Documents|Report Layouts. This will present you with a list of all the layouts. (If your menu structure is not the standard, you can also get there via Processes|Go Anywhere, then find the Report Layouts function in the OP group and Execute it.) From the layout list, select the one called UserQuote and press Detail. Select the second tab (Paper). You will be presented with a form similar to the one below.
Press the ![]() button beside the Paper field; a list of existing quotation paper designs will appear. Press New to reveal the form similar to the one shown below.
button beside the Paper field; a list of existing quotation paper designs will appear. Press New to reveal the form similar to the one shown below.
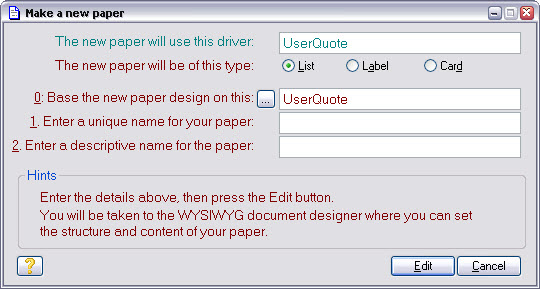
If we had already created a master quotation paper to use as the basis of a new version, we would enter its name in the space provided at Base the new paper design on this. However, in this exercise we will start from scratch, so delete whatever is now showing in this space (so that it’s left blank), and press Edit.
This is the point at which the List & Label designer is started, and since we are starting from scratch, your screen should look something like that shown below:
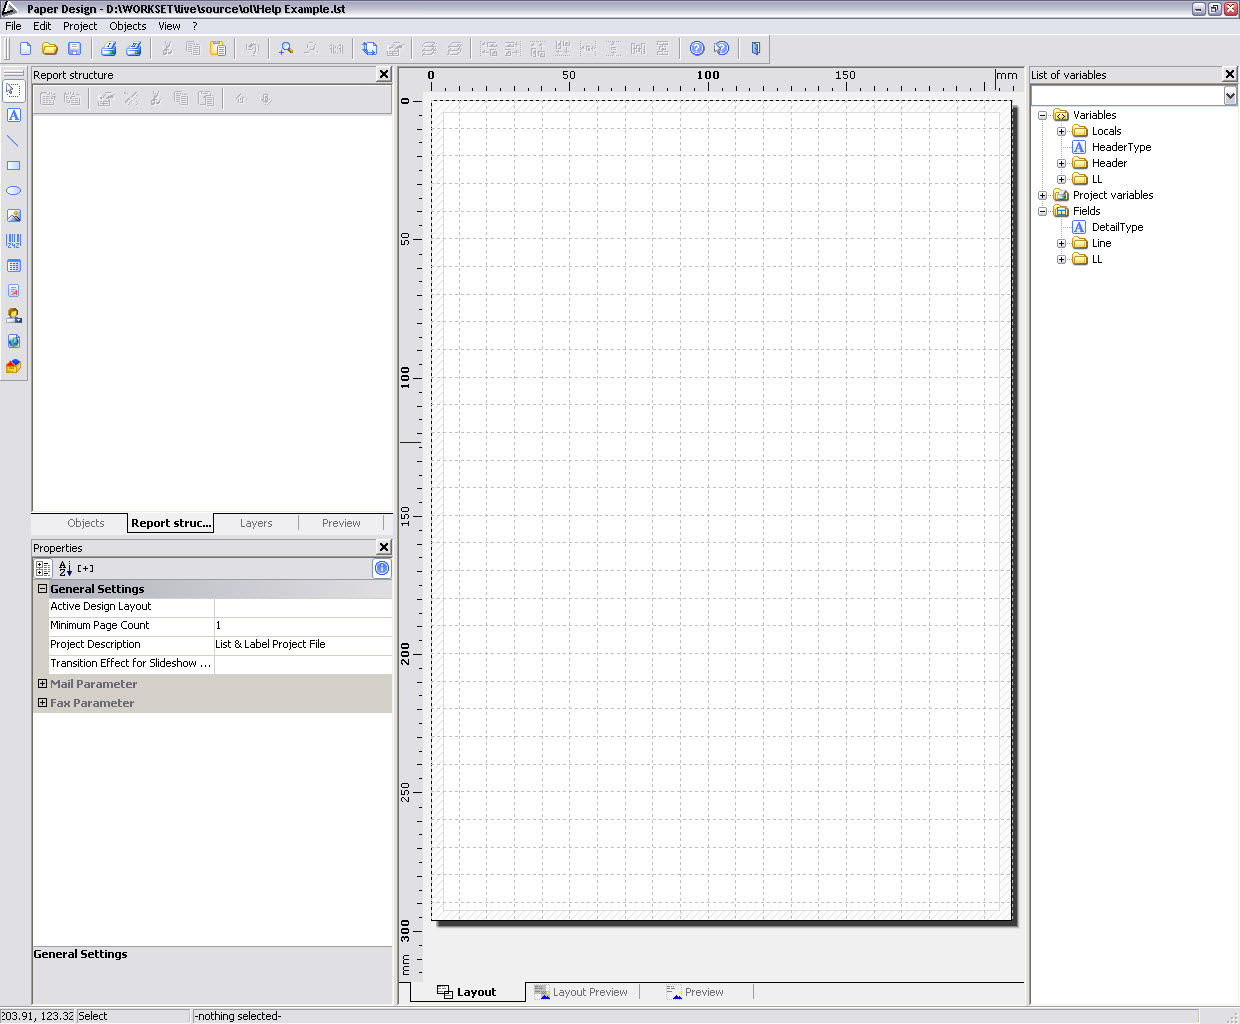
The three tabs at the bottom of the screen – Layout, Layout Preview and Preview all show the same information about what’s in your document design, but in slightly different ways. The differences are similar to the alternative views that most word processors offer: ‘normal’ or ‘print layout’, for example.
It’s generally easier to design your paper using the Layout view, but periodically move across to the Preview tab to get a better idea of what the printed document will look like. The Layout Preview tab is intended to be the best (or worst!) of both. Press the Layout tab now.
Note that List & Label has its own help system, which is accessed in the usual Windows™ manner. You can use this to learn about controls not covered in this topic, although the system’s language is sometimes less than perfect and betrays the product’s German origins. This List & Label help is entirely separate from Match-IT’s own help system.