How do I put detail information into my paper?

Contents
The detail lines of your papers will normally comprise the parts that you are quoting, selling, making, buying dispatching or invoicing. You enter these into your paper by means of a table, which is a type of report container in List & Label terminology.
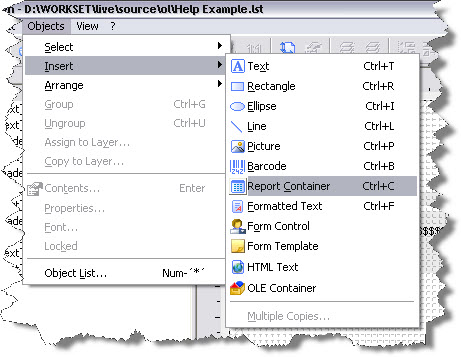
From the Objects menu, select Insert and then Report Container as shown below:
Using your mouse, define the position and size for the table area by dragging the cursor from one corner of an imaginary ‘box’ to the diagonally opposite corner. Make the box the whole width of your page below your header information, but don’t worry exactly where – it can be moved and re-sized later.
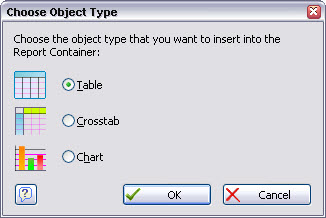
When you release the left mouse button, a dialog will appear asking you which type of container you want. Only the Table type is usable in Match-IT, so make sure you select the table option as shown below:
Press OK. Next List & Label will ask you where the information for the table is to come from. A form like the one below will be shown:
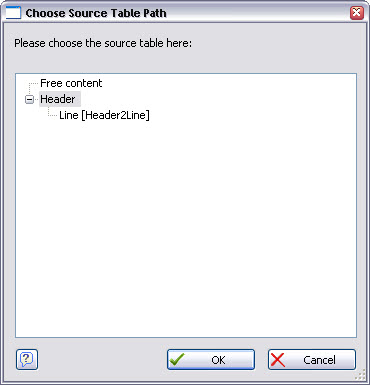
What you see in this form will depend on the type of document you are creating. It shows a view of all the information available and how they are related. In the quote example you will see a Header table and below it a Line table. Notice the Line table is indented, this indicates it is a 'child' of the Header table. This means for every Header there can be any number (including none) of attached Lines, i.e. for every quote there can be any number of quote lines - just as you would expect. A single level like this is the simplest case, you will find other documents with much more complex structures, in Match-IT the most complex is the works order, containing 18 tables.
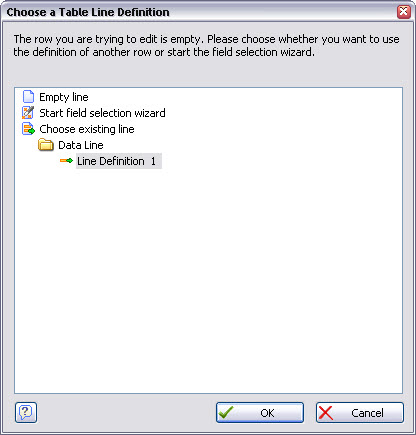
Select the Line [Header2Line] entry and press OK.
Next, a form will be shown to allow you to pre-select fields. This is a tool that is described in more detail in the List & Label manual. Will not use it here, press OK then OK again. You should now see an outline of your table similar to the one below:
Double-click anywhere inside the table area to open the Table Contents form, and select the tab labelled Data Line as shown below:
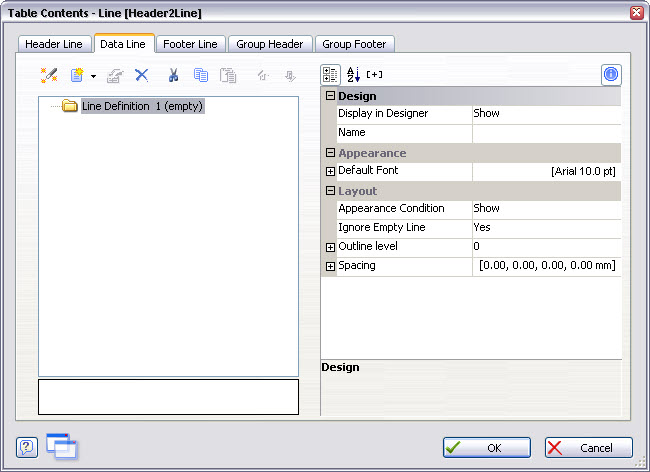
This is where you specify the columns of your detail lines, and when creating your own papers you will need to decide on these before you go any further.
In this example, let’s assume we want to have 7 columns of information for the items we are quoting to our customers, as follows:
•Line Item Reference
•Our Part Number
•Customer’s Part Number
•Description
•Quantity
•Quoted Price
•Quoted Delivery Date
To specify these columns, click the append column icon: ![]() . This opens the Edit Table form as shown below:
. This opens the Edit Table form as shown below:
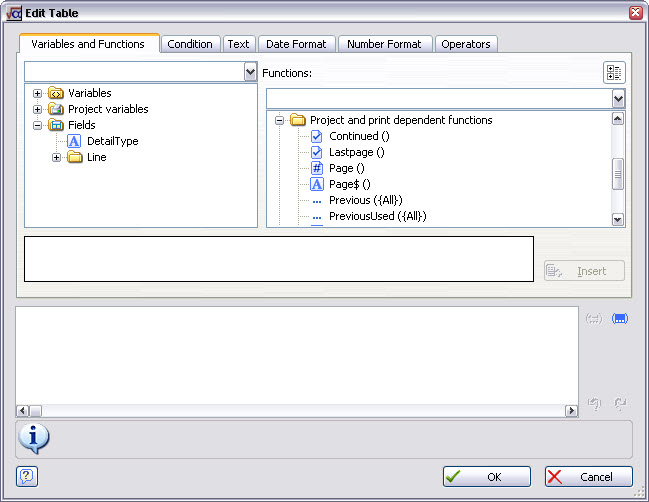
You should immediately recognise this form as being almost identical to the Edit Text form that we used earlier for our header text and variables, and indeed it operates in the same way. The difference is that we now have a group of Fields in the Variables and Functions section, as shown above.
Most of the information we require for the detail part of our paper is contained in the Fields group, so press the + symbol to the left of the word Fields, and then Line to display the Match-IT files available for use in quotation lines. etq is Match-IT’s quote line file, and you will also notice that a Qualifiers group may also be present; all qualifiers relating to your products can be included in your printed documents by adding them to your papers. The Qualifiers section will only appear if you have created appropriate qualifiers. See Setting up qualifiers for how to do that.
Scroll down the list of fields until you find LineItemReference. This is to be the first (i.e. left-hand) column in our details section, so select it and press the Insert button, then OK to return to the Table Contents form.
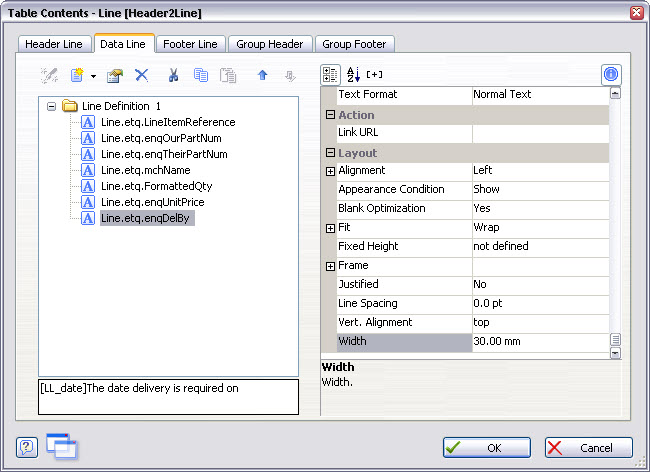
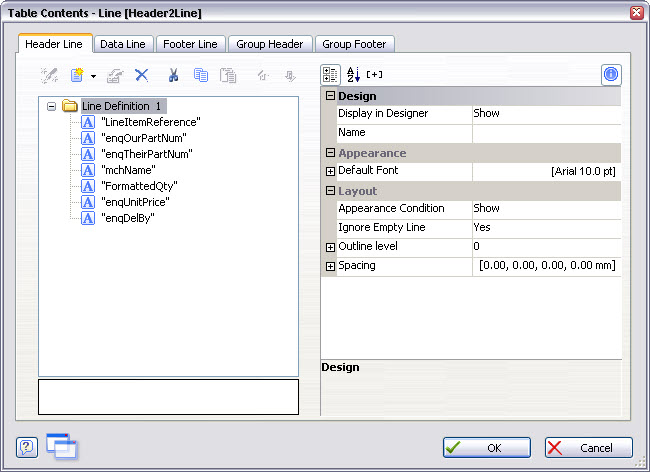
The Table Contents form should now appear as shown below:
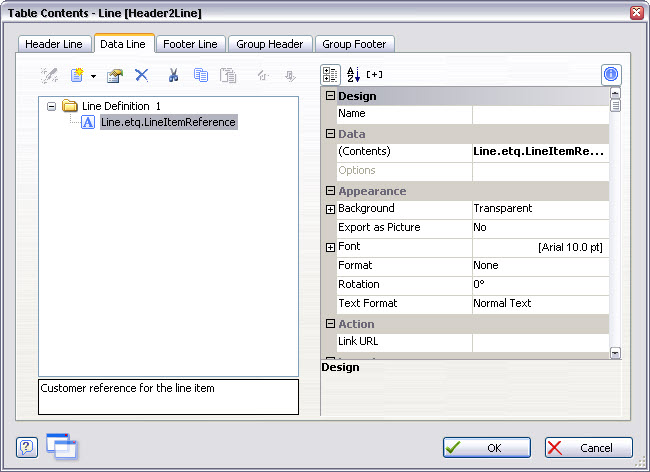
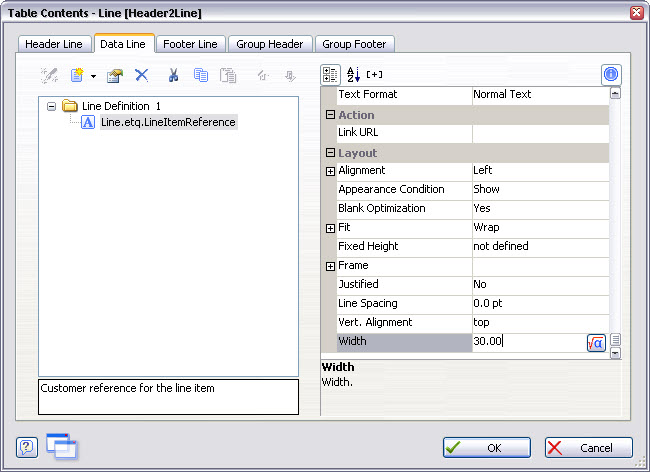
Notice that a number of properties are shown in the area on the right hand side of the form; these enable you to format the column and its contents (i.e. the LineItemReference). If you select (click on) each of these properties in turn, an appropriate editing facility will be displayed in the right hand half of the property which enables you to change the value of the property. In the illustration shown below, the width of the column has initially been set to 30mm, but you can change this using the control provided.
By clicking the append column icon: ![]() , add in turn the remaining 6 columns in the same way. If you’ve managed to find the right variables from the list, your Table Contents form should then look as shown below:
, add in turn the remaining 6 columns in the same way. If you’ve managed to find the right variables from the list, your Table Contents form should then look as shown below:
Press OK to close the form, your design workspace should look as shown below:
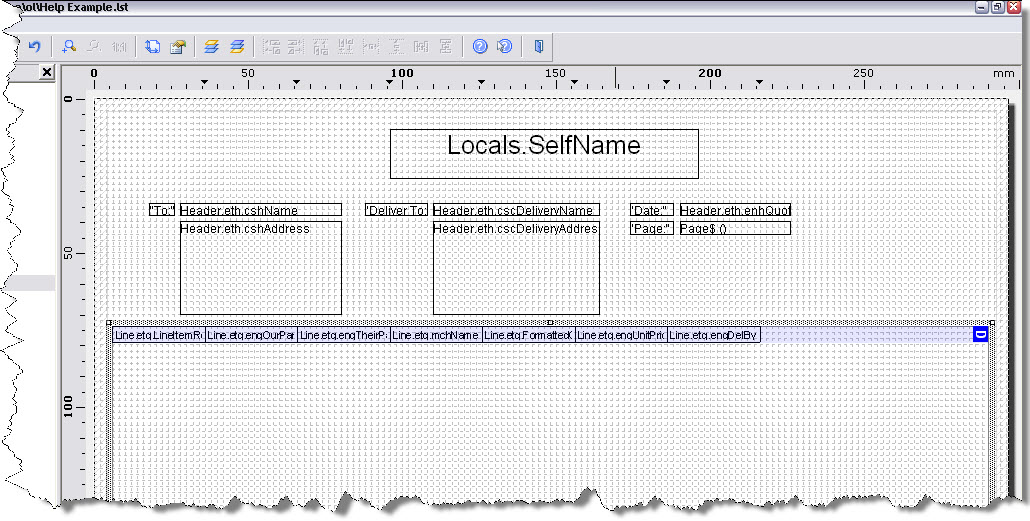
You will notice that at the moment our 7 columns do not take up the full width of the table we have defined. This is just as well, because some columns may need more than the 30mm width that List & Label has initially allocated. For example, the Description column mchName will almost certainly need more space.
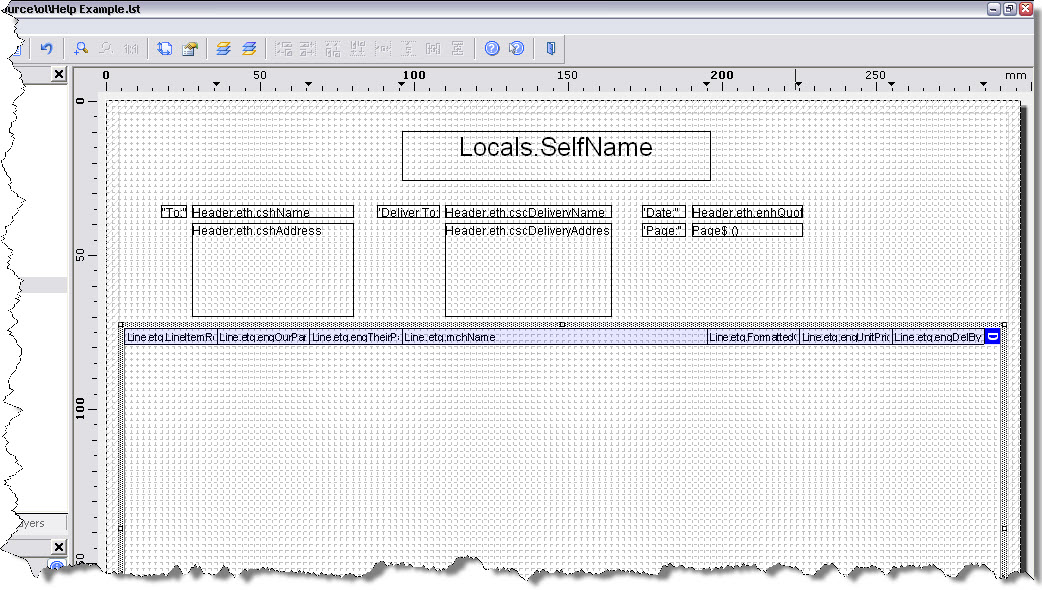
There are two ways to adjust the width of each of your columns: you can activate the Data Line tab on the Table Contents form, select the column you want to alter and specify its width in millimetres. Alternatively, you can do it interactively by placing your mouse cursor over the column boundaries and dragging them to the positions you require. As you move the mouse over a column boundary, you will see the cursor changes to the usual Windows™ column re-size icon, just drag that boundary to where you want it.
When you have increased the width of the Description column, you should have something like this:
When you are creating your own papers, you will probably have to use a certain amount of trial and error to optimise your column widths: too wide and you are wasting precious page width; too narrow and the contents of your columns will be truncated.
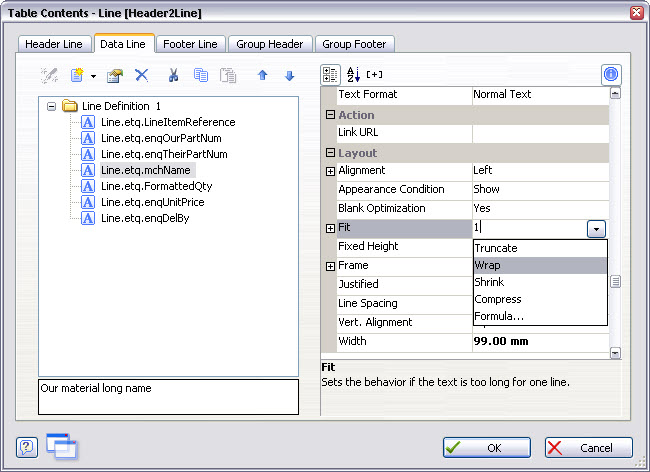
If it proves very difficult to prevent the contents of your columns being truncated, you can tell List & Label to wrap onto a second (and subsequent) line. To do this, select the column you want to be wrapped, and change the Fit property from Truncate to Wrap as shown in the illustration below:
We now need to add some headings to the columns of detail lines so that our customers know exactly what each column is. To do this, select the Header Line tab on the Table Contents form. You will be presented with this form:
List & Label is asking you whether you want it to create column headings to match the details we have just specified. It’s easiest if we do this, so select Line Definition 1 and press OK. List & Label will then create headings with the same column widths as your detail lines, as shown in the illustration below:
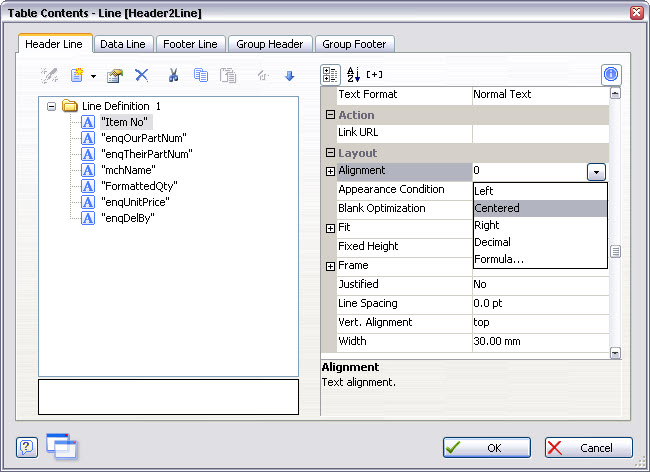
You will notice that List & Label has used Match-IT’s field names for the column heading names, but we can change these into something more meaningful. Double-click on each heading name in turn and edit the text to something of your choice, as shown in the illustration below. You may also want to centre-align the column headings as shown.
When you have given all the column headings meaningful names, press OK to return to the design workspace and select the Preview tab. Your paper should look similar to that shown below:
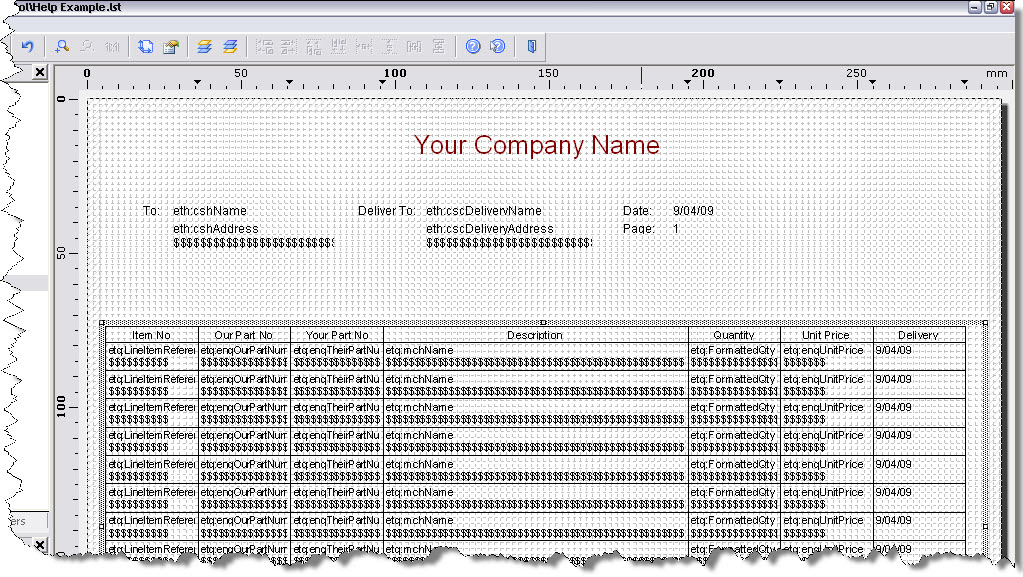
You will notice that the columns are all separated by vertical borders, and also that the items on your quotation are separated by horizontal lines. However, you can control whether these borders appear.
To do this, right-click in the table area and select Properties from the menu shown. A list of properties for the table will be shown to the lower left of the design area, like this:
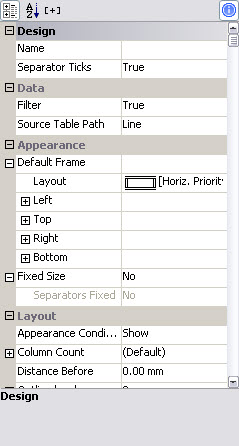
Scroll down and select the Default Frame property, then press the ![]() button that appears. The form shown below appears:
button that appears. The form shown below appears:
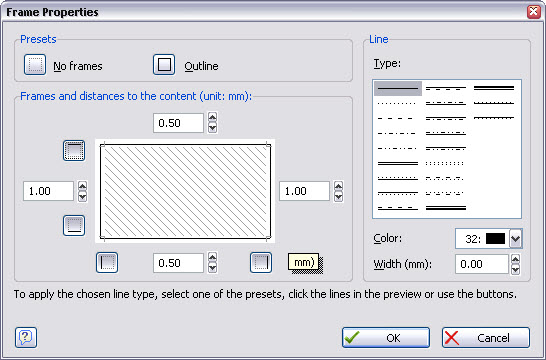
To remove the border lines, click on the line you want to remove, it disappears. Click again, it comes back. Press OK when you are done. Note: You are editing the default frame for all lines in the table, so it will affect the header lines too (i.e. the column titles). You can put them back on those by editing the frame for the individual column titles. To do that, double-click on one of the column titles so that the Table Contents form shows with your column title selected. Then select the Frame property, press the ![]() button that appears and the same frame form as shown above will appear. But, this time only the column selected is being affected.
button that appears and the same frame form as shown above will appear. But, this time only the column selected is being affected.