How do I create a method?

Contents
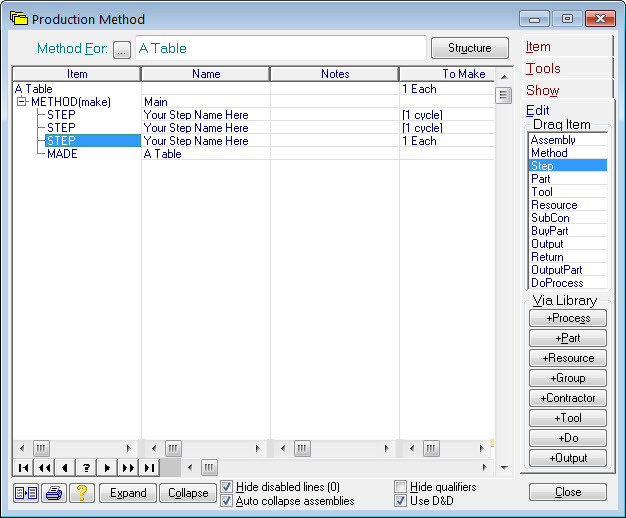
You create methods, or modify existing ones, using the Method Editor. You can access the editor from any material record by pressing ![]() . If you do this on a new material record you’ll see something similar to this:
. If you do this on a new material record you’ll see something similar to this:
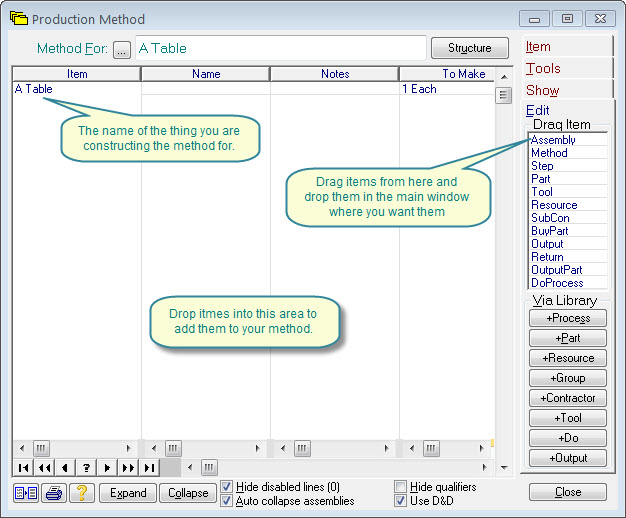
The main area will initially be empty except for a line showing the name of the product, this area is where the method is shown. The buttons and tabs on the right provide a variety of tools to help you construct methods. A description of each of these tools is given later. For now, we’ll use a few of them to construct a very simple method. We will construct a method that describes how to make a simple table, consisting of 4 legs, 4 feet and a top.
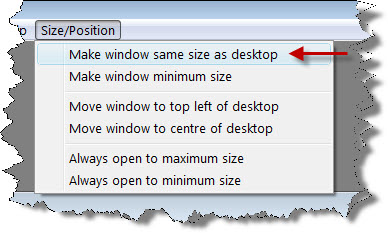
You will benefit from making the method editor window as big as you can, do this by pressing Size/Position then Make window same size as desktop as shown here. |
|
The process we will describe has three operations; first we cut the legs, then we cut the top, then we assemble it. Create a new material record called a table, mark it as a manufactured item, then press its ![]() to open the method editor.
to open the method editor.
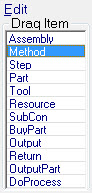
Start by dragging a Method item into the method information area, then drag three Step items below it. Use the Drag Item tool on the Edit tab to do this (as right). |
|
Your method should now look similar to this:
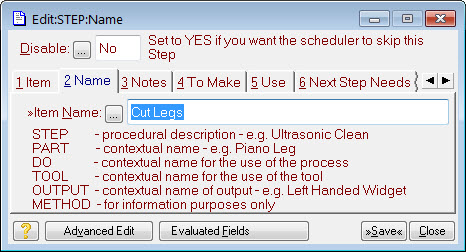
Double click on the first Your Step Name Here entry and type Cut Legs into the form that appears (see below), then press ![]() .
.
This is giving the first operation a name that means something to you. This name will be used on the works order paperwork. |
|
Double click on the second and third Your Step Name Here entries and type Cut Top for the 2nd and Assemble for the 3rd. Your method should now look similar to this:

The next thing to do is to define the materials, or parts, required for each step. We will specify that we need some tube for the first step, a piece of a sheet for the second and some feet for the third. Refer to tutorial on how to create parts and create the following materials and parts:
1.A Tube as a 1D:Tube that is a bought item in 6 metre lengths.
2.A Sheet as a 2D:Sheet that is a bought item in 2 metre x 1 metre sheets.
3.A Foot as a 1D:Item that is a bought item in units of 1 each.
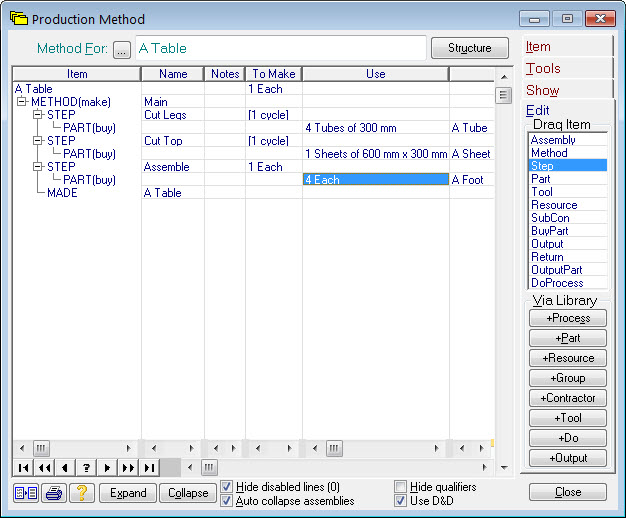
Once you’ve done that, come back to your method editor and press the ![]() tool. This will open your materials catalogue in a mode that allows you to drag items from it and drop them in your method. Find the A Tube material in your catalogue, then drag it into the Cut Legs step of your method (you may need to move the windows around a bit to do this). In a similar manner, drag the A Sheet material into the Cut Top step and the A Foot item into the Assemble step. Your method should now look similar to this:
tool. This will open your materials catalogue in a mode that allows you to drag items from it and drop them in your method. Find the A Tube material in your catalogue, then drag it into the Cut Legs step of your method (you may need to move the windows around a bit to do this). In a similar manner, drag the A Sheet material into the Cut Top step and the A Foot item into the Assemble step. Your method should now look similar to this:
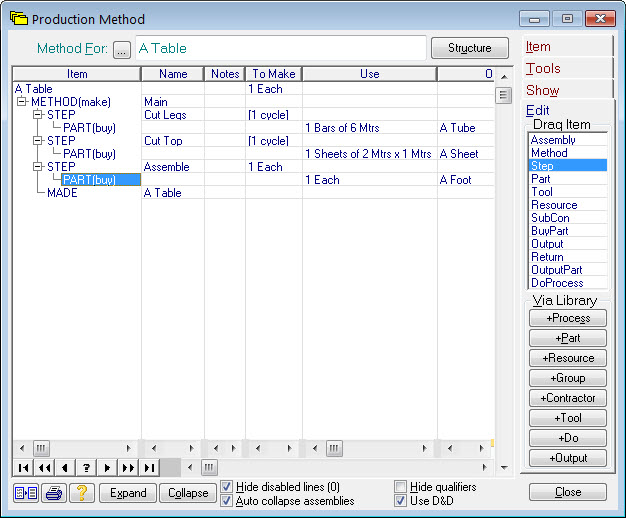
Notice the Use column shows a quantity. When you drop a material into a method, the quantity is initially set at ‘one’ of whatever you dropped. We’ll edit that to be what we really want. Lets say our table has 300mm legs, a 600mm x 300mm top and requires a foot on the end of each of the 4 legs.
Double click on the 1 Tubes of 6 Mtrs quantity associated with the A Tube material. An editor will open that allows you to change the quantity, type in 4 Tubes of 300mm and |
|
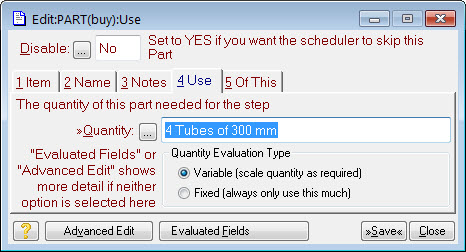
This specifies that you need 4 lengths of 300mm of A Tube to make the legs. Notice you specify both the quantity and the size. The stock system is fully aware of sizes and will always allocate material that is big enough to do the job. The A Tube material record was setup as a 1D material; this tells the system that it is a thing that can be chopped up to any length required. The stock system will create a stock record for each different length you hold or buy, so you are not restricted to holding stock in any particular size, nor do you need to refer to it as a fraction of a full length.
In a similar manner, set the required quantity for the table top as 600mm x 300mm and the required quantity for the feet as 4. Your method should now look similar to this:
Now we’ve specified the materials required, the next thing to do is define the resources required. The resources specify what machines and people are required for each STEP and how much time is required. Two types of time can be specified - SETUP time and CYCLE time. SETUP time specifies the amount of preparation time required before any real work can begin. CYCLE time specifies how much time is required per unit processed. The unit is usually ‘one’ of something and is shown in the To Make column. The SETUP time is fixed and remains the same no matter how many units you are making, whereas the CYCLE time is scaled as necessary to reflect the number of units.
Referring to the tutorial again, create resources as follows:
1.A Saw (a machine).
2.A Guillotine (a machine).
3.An Assembly Operator (a person).
Once you’ve done that, come back to your method editor and press the ![]() tool. This will open your resources catalogue in a mode that allows you to drag items from it and drop them in your method. Find the A Saw resource in your catalogue and drag it into the Cut Legs step of your method. In a similar manner, drag the A Guillotine resource into the Cut Top step and the An Assembly Operator resource into the Assemble step. Your method should now look similar to this:
tool. This will open your resources catalogue in a mode that allows you to drag items from it and drop them in your method. Find the A Saw resource in your catalogue and drag it into the Cut Legs step of your method. In a similar manner, drag the A Guillotine resource into the Cut Top step and the An Assembly Operator resource into the Assemble step. Your method should now look similar to this:
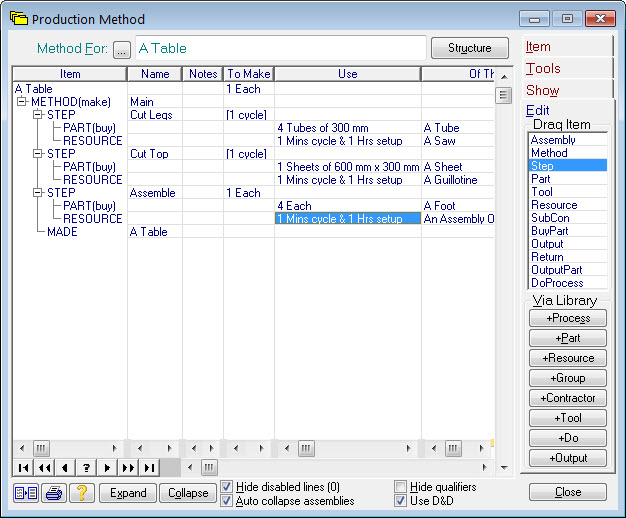
Like dropping materials, initially the times set are ‘one’. Just edit them to the real amount. Let’s say it takes 10 minutes to setup the saw and 30 seconds for each cut; 15 minutes to setup the guillotine and 10 seconds per cut, with 2 cuts per table top; and finally no setup time for the assembly and 20 minutes to do the assembly of each table. Double-click on the Use column for each resource and edit the time as appropriate.
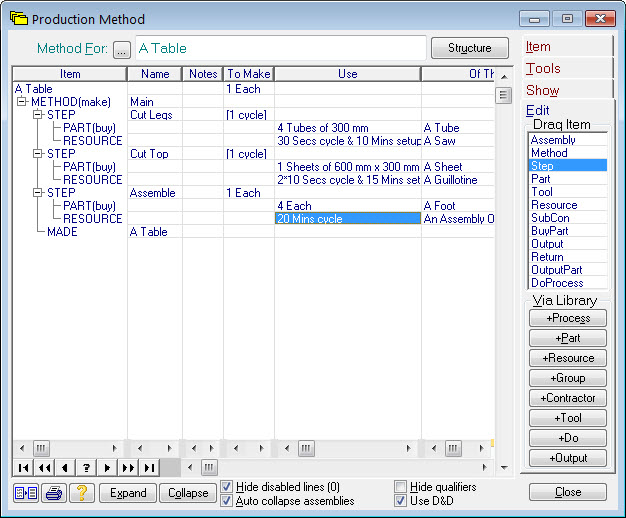
Your method is now complete and should look similar to this: