How do I add more data lines to my paper?

Contents
Despite your best efforts to optimise column widths, wrap text, etc. you may still find that you need to print more information in some of your business documents than there appears to be space for. If you had this problem on a manual system, you would probably solve it by putting more information into one or more of the existing columns underneath what is already there. This is also possible with List & Label.
Double-click on the table to open the Table Contents form, select the Data Line tab, select the Line Definition 1 folder and press the ![]() icon. This will open a dialog to allow you to create another line, as shown below. Note: The
icon. This will open a dialog to allow you to create another line, as shown below. Note: The ![]() icon must be selected when the Line Definition 1 folder icon is selected, otherwise you'll get the dialog to add another column to the existing line rather than that to add a whole new line.
icon must be selected when the Line Definition 1 folder icon is selected, otherwise you'll get the dialog to add another column to the existing line rather than that to add a whole new line.
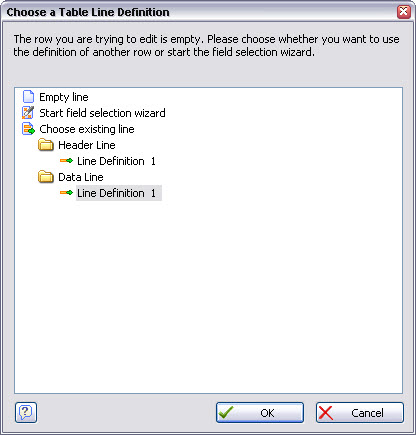
List & Label is asking you whether you want it to create a second data line to match the column headings or data line we have already entered. It’s easiest if we do this, so press OK. List & Label will then create a second row of data which is identical to your first detail line, as shown in the illustration below:
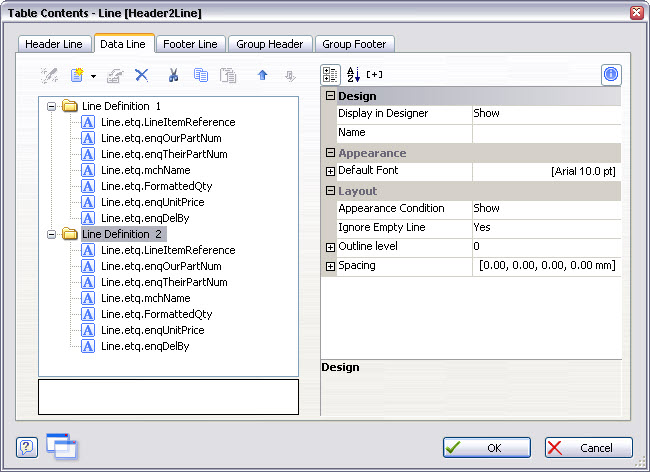
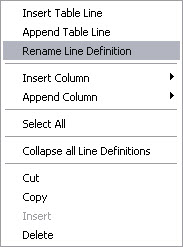
List & Label will give your new line the name Line Definition 2, but you can rename these lines to anything that is meaningful to you. Right-click on the Line Definition 2 line and select the Rename Line Definition item as shown below:
We now need to specify the information we require in this second line of data. In our example, only the Description column (which is the fourth one) is to have extra information. Double-click on each of the other columns in turn and replace what is there with blank text. Then double-click on column 4 and replace the contents with some text – Drawing No:,– a plus sign and then the field called mchDrawingRef. Press OK to return to the Table Contents form, which should now look as shown below:
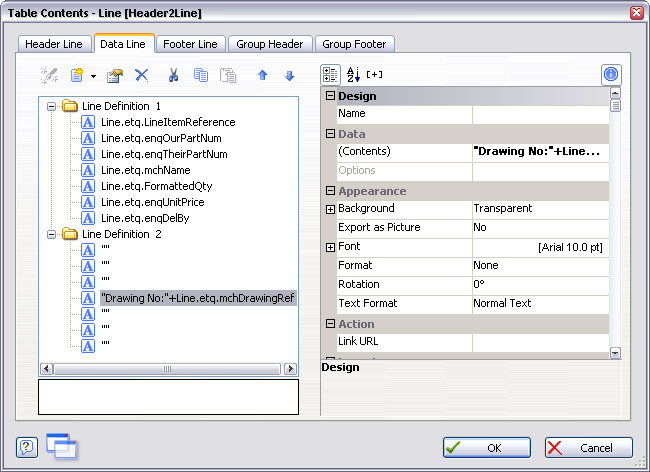
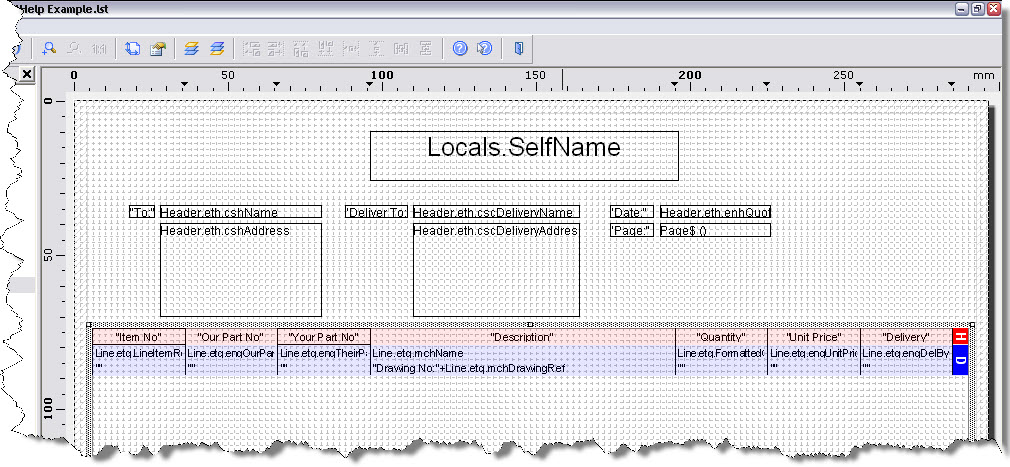
A second line showing the drawing number will now be printed underneath the part name in the Description column of our quotations.
Press OK to return to the design workspace, which now appears as shown below: