Enter Order Line Detail

Contents
The initial order line entry form for our order looks like this:
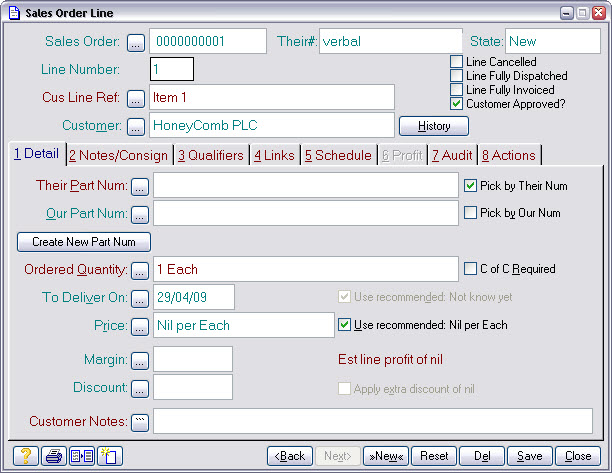
We will only concern ourselves with the minimum information needed to process the order. That is the item being ordered, the quantity and the required date. We’ll leave the price until later. The first step is to select the item being ordered.
We do that by pressing the ![]() by the Their Part Num: prompt. This brings up a select list of all the jobs you’ve done in the past for the customer involved.
by the Their Part Num: prompt. This brings up a select list of all the jobs you’ve done in the past for the customer involved.
The next step is to select their part number.
Select Their Part Num
The customer part pick list will look something like this:
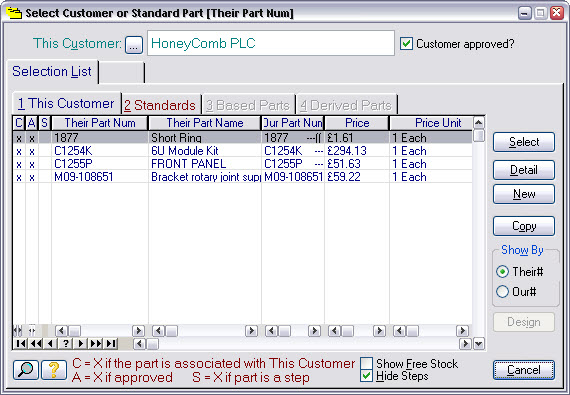
The form shows a list of job names. The Their Part Num column shows the name used by your customer; the Our Part Num column shows your name for it, which can be different.
If the order were for a new job, you would press New here to enter its details. In our simple example we’re going to take an order for a job that’s been done before. In this case we just need to select it from the list. We’ll choose the C1254K item. Pressing Select enters the highlighted part into our order line form.
The next step is to enter the ordered quantity. This can be done by typing directly into the Quantity: field or by pressing the ![]() to bring up an editing form. We’ll do that so you can see how quantities are formatted.
to bring up an editing form. We’ll do that so you can see how quantities are formatted.
Enter Quantity
The quantity editing form looks like this:
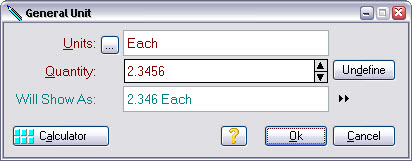
The Units: field defines the units of the quantity. This was set automatically when you selected the part. Match-IT allows any type of unit of measure, and it will convert between them automatically whenever necessary.
You type the required amount in the Quantity: field. The Will Show As: field shows how the amount you enter will be displayed and printed. The picture associated with the unit of measure controls this. These are modifiable by you. The picture associated with the Each unit only displays 3 decimal places, so if you type 2.3456 into the Quantity: field, the Will Show As: field will show it as 2.346. Note: The quantity is still stored within the Match-IT databases as 2.3456, it is only the displayed and printed form that is 2.346.
Type a quantity of 10 for our order and press Ok to enter it into our order line.
The final step in the order line entry, that we’ll do here, is to set the delivery date required. Again, you can type the required date directly into the To Deliver On: field or use the ![]() to bring up a calendar. We’ll use the calendar.
to bring up a calendar. We’ll use the calendar.
Note: Make sure the Use recommended check box to the right of the To Deliver On: prompt is not checked, otherwise you will not be able to change the date.
Enter Deliver On
The calendar looks like this:
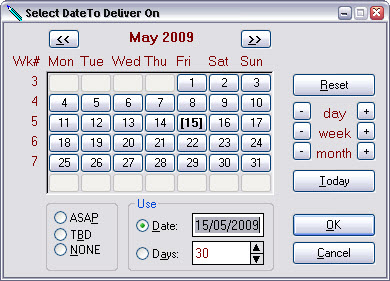
The Date: field shows the date that is currently set. This initial date was set when you selected the part. The initial date can either be set as a number of days after today (30 in this example) or it can be set to the standard lead-time for the part and quantity selected. In all cases you can override the initial date. We’ll see later how Match-IT checks if the date set can be achieved.
The Wk# column in the calendar can either show the week number relative to today, so week 1 is this week, week 2 next week, etc., or it can show the week number relative to a reference date you set, your financial year start for example. Initially, Match-IT uses week numbers relative to today.
The Days: field shows the number of days away from today the set date is. A positive number shows days into the future and a negative number shows days into the past. The ASAP radio button can be used to set a date of “as soon as possible” and TBD means “to be defined”.
You can set a date by either typing into the Date: field or by navigating the calendar. For this example select a date of 7 days time, check the Date: radio option and press OK to enter it into our order line. This will set the specific date selected into the form. If instead you checked the Days: radio option, a relative date is set. A relative date is shown as a number of days. This can be useful when doing quotations as you can quote a delivery date as a number of days after receipt of order.
For this example, we’ve deliberately chosen a date that cannot be met. You’ll see the effect of this later, when we plan the work for this order.
Finally, we must save the order line.
Save Order Line
We’ve entered all the information needed for now on this order line. Press Save then Close to save the information and return to the sales order form. If you try and close the form without first saving, you’ll get a message telling you so, and giving you the opportunity of saving or discarding your entries.