Creating print queues

Contents
A print queue is a logical grouping of documents that require similar print capabilities or stationary.
Print queues can be turned on and off; when 'off' (disabled) documents are held in the queue until it is turned on again.
You can have any number of print queues. You can direct any document to any print queue. You can associate any printer with any print queue.
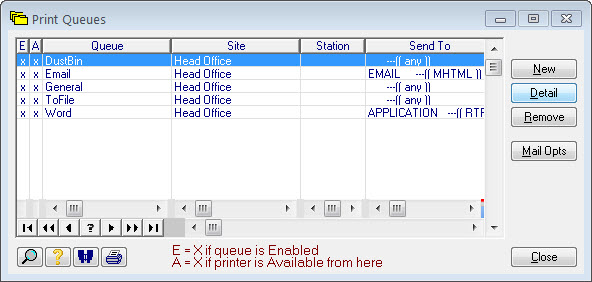
You can see a list of your print queues via Favourites | Setup... | Setup Documents... | Print Queues, the installed pre-set list will look similar to this:
To edit an existing queue press Detail. To add a new queue press New, you'll see a form similar to this:
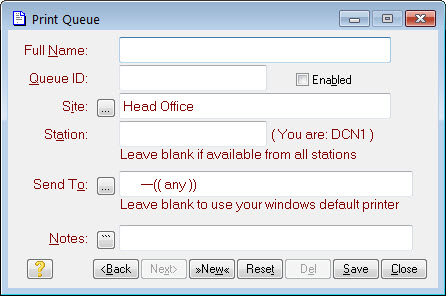
Give the queue a descriptive Full Name and a identifiable Queue ID and check the Enabled box. Leave the Site field at its default setting.
If you fill in the Station field it means this print queue is only available from that workstation. The Reporter will only print documents sent to the queue if it is running on that station. This is useful if the attached device is only visible from that workstation. If left blank it means the queue can be accessed from any workstation.
The Send To field specifies the device the queue is attached to. Pressing its ![]() will bring up a form like this:
will bring up a form like this:
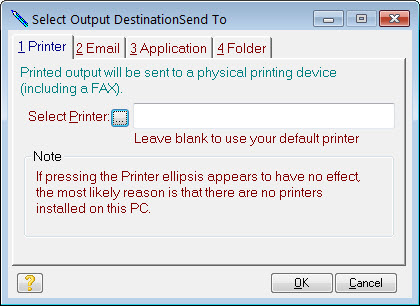
To send the output to a printer use Select Printer, this will take you to the normal Windows printer selection dialog.
To send the output as an email select Email tab. You will be presented with a series of format options similar to this:
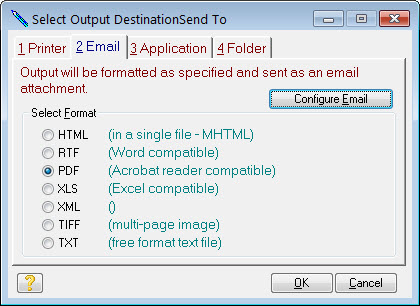
When selecting a format keep in mind that some formats will require your papers to be specifically designed to that format. The recommended format for normal documents is PDF.
Choose the Application tab to send the output to an application. You will be presented with a similar set of format options. Sending to an application means creating the output in the selected format and then opening the application that is associated with that format through the normal Windows file associations.
Choose the Folder tab to send the output to a folder. The same format options are again available. Sending to a folder means creating the output in the selected format and then saving the file(s) created in the folder specified. The file name used will be the document name and its serial number. The folder specified can be overridden on a print-by-print basis, as can the file name.